
RLC - Main Before & Afters


There is something about before and afters that I like so much, and I'm talking about room makeovers.
Witnessing a room's transformation is something I've always loved to see.
I like it even better when a room starts as an ugly duckling and turns into a beautiful swan.


The before:
However, the makeover was done to make this room serve a dual purpose: As a dining room for those special occasions and as my office space.


The before from another angle:
Witnessing a room's transformation is something I've always loved to see.
I like it even better when a room starts as an ugly duckling and turns into a beautiful swan.
Ahhh, love it!
Having that in mind, I went to my archives and picked all those before pictures of most of the rooms in my house and put them side by side with the latest work I've done in that room.
Ha, I see significant changes in most rooms, even though my home is still a work in progress and may only partially be finished.
Let me show you my before and afters, starting at the heart of the house...
The before:

A sea of honey oak... Cabinets, island, and floors.

The after:
The same cabinets and kitchen island, only that they were spruced up and painted! The space above the cabinets was closed off, and a backsplash and DIY range hood were installed.
Having that in mind, I went to my archives and picked all those before pictures of most of the rooms in my house and put them side by side with the latest work I've done in that room.
Ha, I see significant changes in most rooms, even though my home is still a work in progress and may only partially be finished.
Let me show you my before and afters, starting at the heart of the house...
*This post contains affiliate links for your convenience. Click here to read my full disclosure policy.
The before:
A sea of honey oak... Cabinets, island, and floors.
The after:
The same cabinets and kitchen island, only that they were spruced up and painted! The space above the cabinets was closed off, and a backsplash and DIY range hood were installed.
A few years later, I gave the kitchen island a new color and removed a couple of doors on the kitchen cabinets, and those small changes gave this kitchen a brand-new look.

A small dining room with no storage space that we hardly used.

The after:
The after:

|
It's so good to have my workspace here on the main floor of the house.
It's now one of the rooms I use the most.
I still keep on staring at that coffered ceiling. I love it!
A plain room in need of architectural detail.

The After:
Adding trim to the doors, windows, and around the room gave this space a good dose of charm.
The before from another angle:
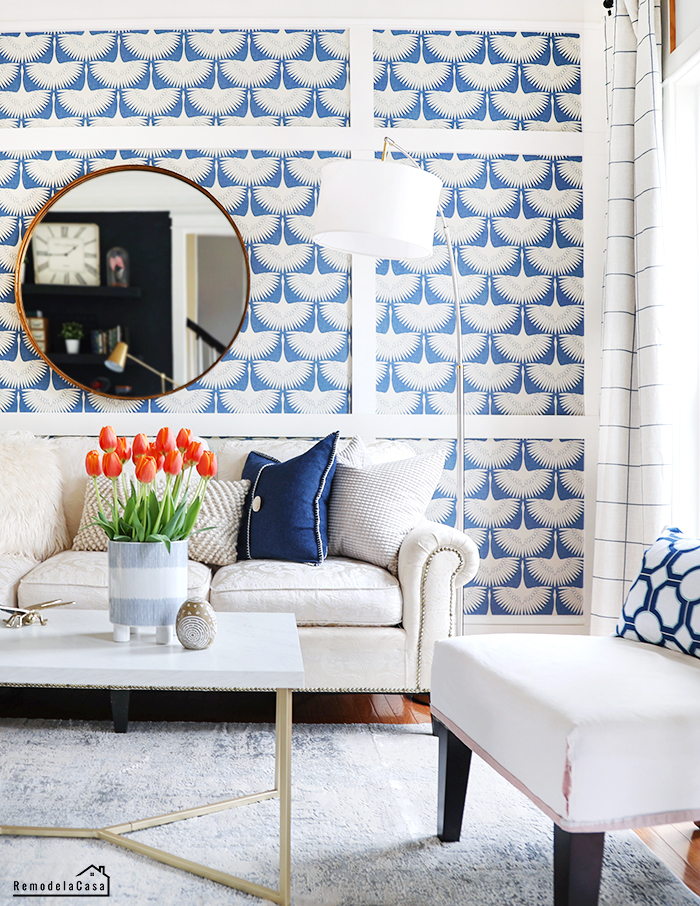
A giant wall that was hard to dress up.

The after:

The after:
Installing a board and batten treatment & adding a fun wallpaper solved that problem.

The main elements of this makeover were a new color on the walls, a new rug, and curtains.
A DIY shell wall art was the focal point for this summer shot.


The after:
The before:

Work still needed to be done, but it looked calm and proper for a good night's sleep.

I like to play styling those shelves here for Summer.

The Second Master Bedroom After:
The before:
A small modern/vintage bathroom with a good dose of charm.


This is the room we use the most, besides the kitchen, which is why I keep decorating it for the seasons.

This room literally got a one-eighty makeover.
Haha, yep.
The TV was switched to the other side of the room, and the sofa was now in between the windows. A new color palette and chandelier brought this room up to today's standards.
So much better!
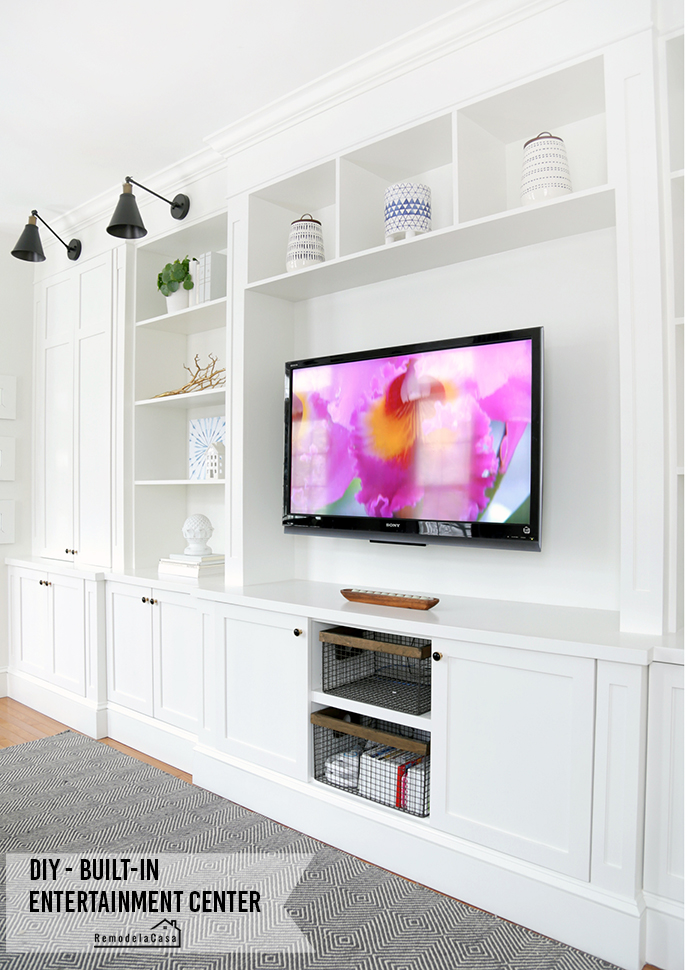
The Built-in unit was DIYed on the left side of the room, bringing tons of storage to this space.
A pink and lilac girly girl room.
The after:


The room that hosted all the pieces of furniture I didn't know where to put around the house. Oh, and my poor boy never complained. :D

The after:
The after:
He got a well-deserved room makeover with lots of storage space, a new closet, and a new bed.
 |
| Light | Bed | Arrow Wall Art | Built-ins |

THE MASTER BEDROOM
What can I say... that was another era. :D

The First after:

The First after:
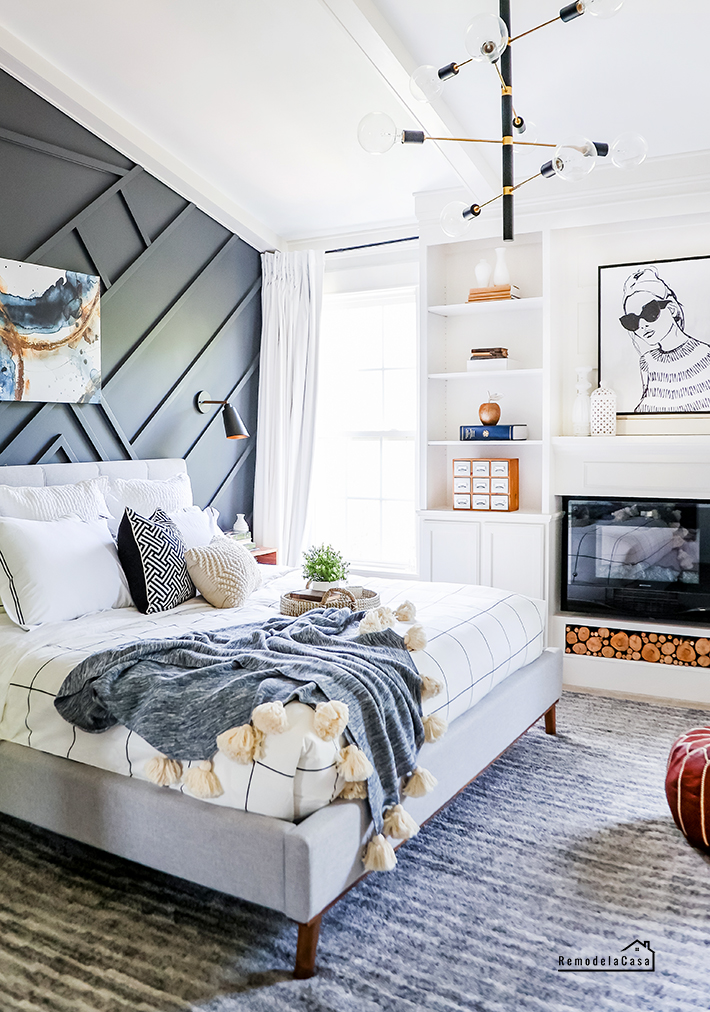
Installing faux ceiling beams, a built-in unit, adding a chandelier, and brightening the color palette sure brought change to this room.
Work still needed to be done, but it looked calm and proper for a good night's sleep.
I like to play styling those shelves here for Summer.

The Second Master Bedroom After:
Ha, this room keeps on evolving!
I went in a new direction here, and I'm delighted with its outcome.
| Bed | Rug | Chandelier | Throw Blanket |

An impressive low-budget makeover with paint and a few DIY projects.
The doors were removed from the vanity, and a shelf was given to that cabinet to turn it into a lovely and modern vanity. The tub was covered with a wooden skirt, and a storage shelf was added behind the door.

The before:


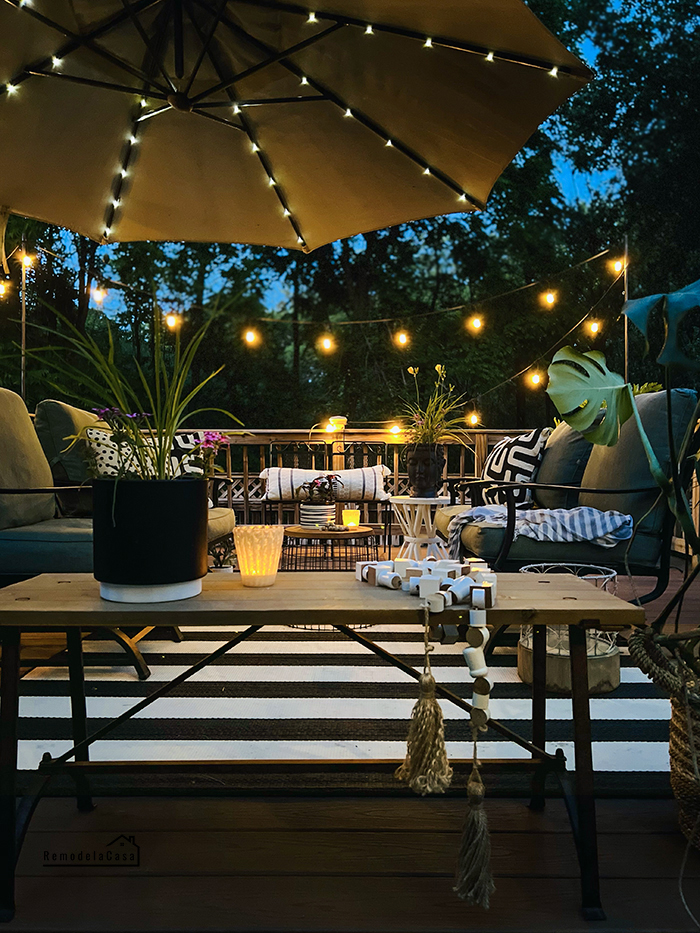
A BORING room!
The after:
BOOM!
Boring no more.


A fun spot to hang out! The floating deck truly changed this space.
Well, that's for now how my home has evolved. It's been a long and happy journey to put my imprint in these rooms, and I hope you can find inspiration for your home.
Thanks for stopping by!
Well, that's for now how my home has evolved. It's been a long and happy journey to put my imprint in these rooms, and I hope you can find inspiration for your home.
Thanks for stopping by!
*This post contains affiliate links.*

I always love seeing your home. It's so bright and cheerful and I don't think I will ever love a boy's room more than your son's! Enjoy your weekend!
ReplyDeleteShelley
Thanks so much Shelley! All those bold colors we used in the 90's have been slowly disappearing. :D
DeleteMy son's still loving his room, and hey, most importantly, keeping it clean!
Oh my word. I need you to come help me put some character into my rooms. Your home is stunning.
ReplyDeletehehe thanks Marty! I think you're doing an awesome job giving character to your new home, look at your kitchen, I love it!
DeleteYou have done some of the most incredible makeovers and are a fabulous carpenter! It blows my mind what you can do. You do trim work just like the professionals that trimmed my kitchen and will be trimming out my master bath. You should be very proud of your work.
ReplyDeleteKim, Thank you so much! It's really so kind of you to say so. There's still a long way for me to proudly wear that carpenter hat, but hey, we gotta have dreams, right! ;)
DeleteI've been so MIA these past weeks with vacation, conference, and other Summer stuff, but I'm heading your way to check that master bath.
Seriously beautiful! Your blog inspires me so much!! Thanks for sharing!
ReplyDeleteAww Sheila, you're as always so nice! It's so good to hear that, thanks!
DeleteYou are one talented lady! I refer to your blog when ever I need inspiration AND courage to tackle any project! Your tutorials are easy to follow and makes me realize I too can do it if I set my mind to it!
ReplyDeleteHehe I like the courage part. :D As I always say, start with a small project, have the right tools and keep on practicing. Yes, you can do it, Ann! Thanks for stopping by and for your kind message. ;)
DeleteYou amaze me! I'm trying to decide what to do with the dining room in our new house and I honestly thought...what would Cristina do? :)
ReplyDeleteAww you're just too sweet Stacey! Your new house is beautiful, but hey, maybe some moldings? :D
DeleteThat's one thing I really love. ;) I'm on my way there, because I got to see bits of your kitchen when I was on vacation and I had to wait and wait for the pictures to upload, the connection was so bad over there. Though, the waiting was so worth it, that kitchen island and your choices of lighting were amazing!
WOW!!! What wonderful changes---so much work, I'm sure, but so worth it! BEAUTIFUL!!!
ReplyDeleteHi Cathy, yes, it's work. But, the more you keep on putting your own imprint in your own home the more comfortable you get and the more you like working on it. Thanks so much for your kind words.
DeleteIt's so fun to see so many of your rooms in one post! I can't even choose a favourite because they're all so good (but ok, maybe your son's room is my ultimate favourite). I LOVE your house. xx
ReplyDeleteThanks Kate! I don't know why I didn't make this kind of recap sooner, I've always loved this kind of posts from my friends. My son's room is at the top of my list. I spent a lot of time working in there, from the closet to the floors and then, to the built-ins - lots of energy and DIY projects are packed in that small room. :)
DeleteI have never seen your home tour! How amazing! Love your style and LOVE your carpentry skills. So very proud of you and so very happy for you. Enjoy your beautiful new home! Susie from The Chelsea Project
ReplyDeleteWow!! I love seeing before and afters as well - but yours should be called before and fabulous!!! Each room looks fantastic, and very livable. Congratulations on many jobs well done!
ReplyDeleteYou have the midas touch for redecorating Miga!
ReplyDeleteEvery space and room is your home is pure perfection and all BY CHRISTINA GARAY INTERIORS.
Your son's room is the most beautiful I've ever seen, which are isually not as pretty as the girls. Congrats!
Fabby
Hahaha Thanks Fabby! You're so sweet! :)
DeleteSorry I'm commenting from my phone amiga.
ReplyDeleteFabby
Love every inch. It has inspired me to tackle and say goodbye to my oak cabinets.
ReplyDeleteOh Amy, I know you're going to love their painted version!
DeleteI just love your home makeover. It looks marvellous. Thanks for sharing the pictures. I am planning to renovate my kitchen and the above tips are really gonna help me with kitchen renovation. Keep Posting!!
ReplyDelete