


Guys, talk about excitement! And, well, a bit of shame because this project took me so long to complete. I'm sure you don't want to hear about this project's troubles and tribulations, so we'd better get onto this reveal!
However, before looking at the pretty pictures, let's check the messy before. Many of you, my regular readers, can skip this part. But if you're new to RemodelaCasa, I have to show you this, the starting point of our garage makeover.
This picture was taken at a point of frustration. There was stuff everywhere, and I could hardly move around. In the back-right corner is the door to enter the house.

Here's a close-up of this awkward platform leading to the laundry room. I could hardly store or display anything here. We had to go up those steps to the right to enter the doorway.
It's hard to see, but a little bench was always there to the right, and a big pile of shoes was lazily tossed inside and outside that basket.

The left picture below was the view from the laundry room door towards the garage.
The photo to the right inspired me, and I shared it with you guys at the beginning of this project.
*This post contains affiliate links for your convenience. Click here to read my full disclosure policy.
 |
| | Mudroom by Form Collective from Houzz | |
Well, today is reveal day!
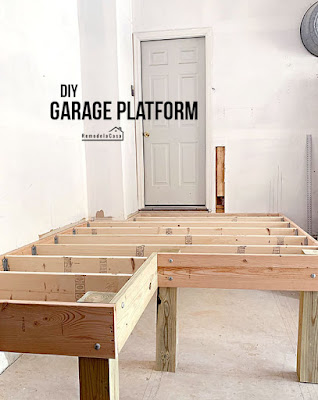
I will skip the building process, but you can find links to everything that was done at the end of this post.
Here is my new view of that same spot. Eeeeeeek, I'm loving it!!! 🖤🖤🖤
 |
| | Pendant Lamp | Rug | Slate Tile | Boots | |
I need to move it soon since there's not enough light for her in that spot. I'm already working on something for that little wall.


This picture below was taken through the window, hence the shadows. It was the only way I could get this wide shot.


The shoe cabinet is a feature of this mudroom that I can't recommend enough. It has ample space for shoes—no more tossing them around!

My last post about this small mudroom focused on the doors and the faux cabinet near the laundry room.
The switches and garage door opener are still there, giving them away, but even my husband keeps trying to open those doors! :D


I'm totally obsessed with these Liberty Artesia cabinet pulls and knobs. They're so sleek!

On the left, I used those real cabinets to store laundry and kitchen necessities on the top, while the long bottom cabinet is used for shoe storage.
A couple of days ago, I was customizing those water hyacinth baskets. The boys got their bottoms spray-painted, and my daughter and I each got a tassel garland.

I debated adding a shelf underneath the bench, but in the end, I tossed that idea to open up this tiny room a bit more.

One last-minute, easy project was to glam up the back cabinet with wallpaper and motion-sensor lights.
Cleaning gadgets are stored below and up there on those shelves. I already have a stash of paper towel rolls stored in there.
One of the baskets is full of winter hats, and the other is still empty. I might remove those baskets later and install sliding doors like I did with the door below them.
 |
| | Wallpaper | Motion Sensor Lights | Door | Lock Set | |
Some shoes, especially the boots in the basket, were in a plastic bag this entire time. When I brought them here, they were dusty and covered with sawdust. I need to give them a good cleaning soon.
One of my final decisions in this mudroom project was painting the ceiling black. I like how it immediately changed the mood of the room. Remember that during the final phases of this project, there was another light here? I had a black pendant that I loved, but sadly, the light I got with that fixture was not enough.


I just remembered that I had to show you the garage side.
That little sign I created with my Silhouette makes me smile: The Mud Room - The dirt stops here - How I wish it were true! :D
I also love that wreath. I got it at The Lucketts Store.
 |
| | Hat | water hyacinth baskets | |
One of my final decisions in this mudroom project was painting the ceiling black. I like how it immediately changed the mood of the room. Remember that during the final phases of this project, there was another light here? I had a black pendant that I loved, but sadly, the light I got with that fixture was not enough.
This new pendant I got at Ikea is very economical and gives me more light than before, but I also like its texture and organic feel.
Oh, I also painted the laundry room door black. I'm so happy with my first black door. I haven't painted the other door that goes to the garage yet. I might keep that one white.

One of the most significant features in this room is that huge thrift store window! Without it, the room would have felt claustrophobic.

Louie 🐶 loves it! He can keep an eye on me when I'm working in the garage, or even better, he can gossip about the neighborhood dogs.

I adore the slate flooring, but a rug was a necessity.
I went for a good punch of color to enhance this monochromatic design.

I couldn't let you go without the regular before-and-afters.

Louie's here, standing in almost the exact same spot.
For the new pic, he kept coming right before me! He can't keep away from the paparazzi :)


We can still park two cars in here. I put all that vertical space to good use.


I hope you have enjoyed this project and found some ideas to try at home.
The next part of this garage organization is painting those floors. I already have all the materials ready to tackle that job. Stay tuned!
UPDATE: The garage floors were painted! You can see that transformation right HERE. It makes a HUGE difference!
Here are all the projects that were tackled during this mudroom build:


* This post contains affiliate links.

I just absolutely LOVE what you need here! Jealous to the point that I’m going to have to think about something similar in my garage. Outside my laundry room is a huge wasted space and this would definitely held with my storage issues. Thanks for sharing this great project.
ReplyDeleteLugene
That's exactly how I felt with all the wasted space close to the door. The way they designed that small platform was so wrong. Hopefully you can find a way to put all that space to good use. Thanks so much for stopping by and for your kind message, Lugene!
DeleteAs always, perfection
ReplyDeleteThanks so much Beck! 🖤🖤
DeleteOh my word, this turned out to be such a fabulous addition to your home and how it functions. It also looks absolutely beautiful. You are amazing, such talent.
ReplyDeleteMarty, you're too sweet, thank you!!
DeleteYou are amazing. Just amazing....First of all, to have the vision to create this and then to actually DO the work! It's beautiful, Cristina! Congrats!
ReplyDeleteShelley
I love this so, so much. We have a weird space in our garage that I would love to turn into a mud room, though I think my husband would kill me if I tried to do this much. That black ceiling -
ReplyDeleteHoly cow - inspired!!!
it looks awesome! Useful and beautiful, and good for the puppy (I know my priorities!) Love all the details. from sign to wall paper to painted basket, just lovely!
ReplyDeleteIt's a fantastic space. Your skills are impressive, too. Love Louie in the photos.
ReplyDeleteSooooo impressive! Your vision is amazing!
ReplyDeleteWhat a totally wonderful transformation! You have such incredible vision to be able to make something beautiful and functional out of a little landing. I love that Louie gets excited about your projects as well. The changes you are making in your home have me looking at our home through a "different lens" ... maybe we could do something...
ReplyDeleteWOW!!! OMG! That is the most amazing thinking-outside-the-box genius transformation of all time!!!!
ReplyDeleteWell done. I am shocked. You have a great design mind. That truly is remarkable!
This mudroom is nicer than my house!!! You did a superb job. Love every single detail. ~~ Susie from Chelsea Project
ReplyDeleteYou did such an amazing job with this whole project Cristina!! I absolutely love your work, you're incredible! Your version is even prettier than your inspiration photo!!
ReplyDeleteGreat functional space!
ReplyDeleteThanks so much!
Delete