Hello there!
I'm back today with the framing and drywall installation in the mudroom. I didn't want to leave you hanging there until next week.
I am going to give you a recount of what was done. As I told you in previous posts, all this type of work is new to me. I was present for most of it, but in reality, I was just a little helper.
This is the final picture of the work done last week.
*This post contains affiliate links for your convenience. Click here to read my full disclosure policy.
FRAMING
The framing started with the installation of 2 x 4s or bottom plates right where the walls would be built.
This DeWalt Cordless framing nailer with its corresponding framing nails was the power tool that rocked this entire framing job.
Extension cords or compressors are not needed; this nailer has all the power you need for this application!
 |
| | DeWalt 21-Degree Framing Nailer | |
A level, a miter saw to make the simple cuts on the 2 x 4s, and a ladder are the other tools you'll need.
A light fixture and two outlets in the middle of the room.
Horizontal 2 x 4s, or nogging, were also installed between the vertical studs. They strengthen the entire structure.
Once the framing was done, it was time to install the window. Yep. I used only one window because wall space is important in a garage and a mudroom. It equals storage. ;)
That window was heavy, well, for only two of us. I had to call the boys inside the house to help us.
This is how it looked from the inside. ❤️
DRYWALL
Yup. Drywall was next. We used nine sheets of 1/2" ultralight drywall for this small room. Six were 4 x 8, and the others were 4 x 10.
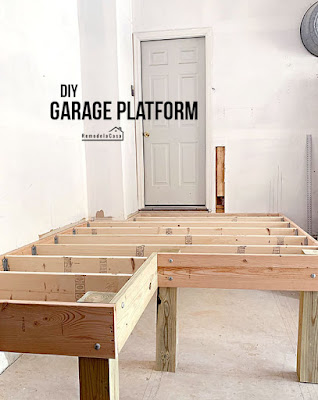
We covered that space below the platform because I wanted it completed and looking good. However, I still need to plan a design for that storage area.
Once all those drywall panels were installed, this is how the room looked:
And look at the inside. I'm loving it! 😍😍
DRYWALL MUD
The next step was to make those walls look good and smooth. I'm bad at this, so I gave it to a pro.
He used metal corner bead, joint tape, self-adhesive mesh drywall tape, a mud pan, and this, and this joint knife.
The main ingredient for this job is the joint compound.
That window was heavy, well, for only two of us. I had to call the boys inside the house to help us.
DRYWALL
Yup. Drywall was next. We used nine sheets of 1/2" ultralight drywall for this small room. Six were 4 x 8, and the others were 4 x 10.
We covered that space below the platform because I wanted it completed and looking good. However, I still need to plan a design for that storage area.
DRYWALL MUD
The next step was to make those walls look good and smooth. I'm bad at this, so I gave it to a pro.
He used metal corner bead, joint tape, self-adhesive mesh drywall tape, a mud pan, and this, and this joint knife.
The Easy Sand comes in different working time strengths. He used 20, which means it dries in about 20 minutes. You can find it in 5, 30, 60, etc.
He also used the All-Purpose joint compound at the end to fine-tune some seams.
And well, here is how it looked at this point:
Did you notice we replaced the old staircase? Haha, yeah, it looks much better, doesn't it?

And well, here is how it looked at this point:
Did you notice we replaced the old staircase? Haha, yeah, it looks much better, doesn't it?
The staircase is precisely the main topic for my next post.
-------------------- . * . * . * . * . * . -------------------
Here are all the projects that were tackled during this mudroom build:
*This post contains affiliate links.


Oh my word, this is amazing. You've done such an amazing job.
ReplyDeleteAww thanks Marty! I'm so very excited about this project!
DeleteFascinating! What an incredible transformation! You are so inspiring! Keep those posts coming--I'm taking notes!
ReplyDeleteBy the way, this is the most original project I have seen any DIY-er do! How do you even think of these things? Total fan....
DeleteThank you so much for your sweet note! Many times I hesitate on posting only pictures without giving plenty of details about a project, which was the case for this post. But then, I remember the saying..."A picture is worth a thousand words" - exactly how I feel when I'm contemplating doing something and the only reference I have is a picture. For me, they work even better than words. :D
DeleteThis has been fascinating to watch! Love your blog and can't wait to see you finish it! You're so inspiring!!
ReplyDeleteI'm so glad to hear this. Thanks!!❤️
Deletewow, awesome building skills! probably easier than your bathroom remodel, but great impact!
ReplyDeletetotally looking forward to the progress!