

However, before I go any further with this update, I'm so sorry I left you hanging in midair with this project. It's been almost a month since my last report, and let me tell you, it hasn't been finished.
There were a myriad of motives that made me put this project on hold, among them the steamy hot weather ruining the painting job.
I also had another little project to take care of, and life with the regular turns it takes and other little extras thrown in the mix.
Anyway, this is how this space looked after installing the slate floor:

I asked my nephew and designer Julian to draw the plans for this space.
Now, those cabinets on the right are only an illusion, as you can see in the picture below. That's, in fact, a wall that I'm planning on making look like a tall cabinet.
The tall cabinet on the left will be the shoe cabinet. There's also space for another cabinet in that nook. It can be a closet or a space to store vacuum cleaners, brooms, etc.

I used painter's tape to mark the placement of the cabinets on the floor.
Now I need your help!
Anyway, this is how this space looked after installing the slate floor:
I asked my nephew and designer Julian to draw the plans for this space.
The first picture you saw above shows the view when looking, let's say, through the window. A sitting bench is right there in the center.
Now, those cabinets on the right are only an illusion, as you can see in the picture below. That's, in fact, a wall that I'm planning on making look like a tall cabinet.
The tall cabinet on the left will be the shoe cabinet. There's also space for another cabinet in that nook. It can be a closet or a space to store vacuum cleaners, brooms, etc.
However, the shoe cabinet looked too narrow. I was planning on storing three pairs of shoes per shelf, which gave me a more or less 27" wide cabinet. The main problem with this measurement was the door size.
Only one door would've been too broad, and two 13.5" doors would've been too skinny.
Hmm, decisions... Decisions.

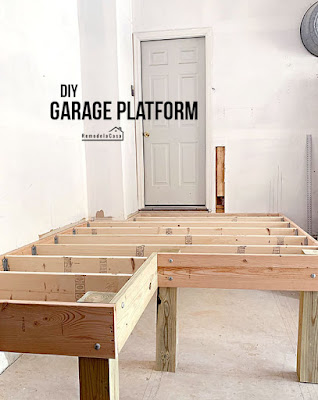
After all the planning, the building part started.
After all the planning, the building part started.
I was super happy to have my son as my big helper. He wasn't too joyful during those first days of work, but lately, he's been more eager to complete the tasks I give him. He's a quick learner, and that's a big bonus.
 The big shoe cabinet was built.
 It was brought immediately inside the mudroom. The lower shelf will hold the boots. There are four pairs of shoes on each shelf.

Then, a small cabinet was installed above.

Then, a small cabinet was installed above.
According to the plan, I had to build/install another cabinet in that space in the back. But I thought it would've been a waste of materials since the walls already act as cabinets—it's an enclosed area!
I appointed Matt to manage that space. Here, he is making leveled lines to install shelf supports.

The cubbies above the bench were also installed.

Matt started painting the cabinets, but the weather was so hot and humid that the paint job didn't look good. He had to sand and paint again. And then again, it didn't look good. That's when we had to take a break. :/
Most cabinets will have doors, the four lower cubbies above the bench will be open, and baskets will be placed there.
I'm painting everything white inside, except the shoe cabinet, which will get a clear coat.
I was still deciding the color of the doors.
The cubbies above the bench were also installed.
Matt started painting the cabinets, but the weather was so hot and humid that the paint job didn't look good. He had to sand and paint again. And then again, it didn't look good. That's when we had to take a break. :/
Most cabinets will have doors, the four lower cubbies above the bench will be open, and baskets will be placed there.
I'm painting everything white inside, except the shoe cabinet, which will get a clear coat.
I was still deciding the color of the doors.
I thought of painting the cabinets dark green, gray, or light blue. But this space is so small and rather dark that any color besides white can make it look drab. So, I guess white will be my choice.
Well, this is how it looks right now:

A sliding door will be added to that backspace.
Well, this is how it looks right now:
A sliding door will be added to that backspace.
Now I need your help!
How can I hide those switches there on that wall? 🤔
Remember, that wall needs to look like it's full of doors!


-------------------- . * . * . * . * . * . -------------------
Here are all the projects that were tackled during this mudroom build:


*This post contains affiliate links.

So exciting! I used to be annoyed when my dad made me help him in his workshop as a teenager. Now I'm 63, and I tie on his old apron and take his tools and build things all the time! He's been gone 10 years, but I feel close to him again. So grateful for those memories and for what I learned!
ReplyDeleteThanks so much for your sweet note! It makes me feel better about "making" him do this. :) That's what I keep on telling him: This is not what you're going to do for a living, but you have the foundation/knowledge to build anything you want to. How I wish I had those same type of memories with my mom or dad. ❤️
Delete