The makeover of this tiny powder room continues, and this time, I had to do something with our toilet paper holder situation.
If you're new here, let me tell you that I finally gave this little bathroom the green light for a makeover. Something that's long been due. You can check my previous post, where I installed a new vanity, and I'm so happy with how it turned out.
The recessed toilet paper holder idea became an actual project out of necessity. There's even a little story that goes with it. Let me tell you about that. You can also watch the full video about this project at the end of this post.
The builder gave us a toilet paper holder smack in the middle of the big front wall of this little room. When we opened the bathroom door, or if the door was left open, we only saw the toilet paper roll.
Many years ago, when I gave the bathroom its first makeover, I moved the toilet paper holder to the opposite wall, as you can see in the left picture below.
I was so happy that it was now somehow hidden on that wall. Additionally, the holder I installed was perfect because it was an open-hook design that made exchanging paper rolls very easy.
However, that open-hooked design was precisely the big problem we encountered soon after. When visitors propped themselves up to use the nice facility, the toilet paper roll would come off the holder and land on the floor.
After multiple toilet paper rescue missions, we got tired of the paper holder and removed the hook, leaving behind an eyesore of a stump.
The top of the tank has been the designated spot for toilet paper rolls for several years. And believe me, it's not the comfiest situation.
I finally got rid of that stump and was glad to see it was mounted on a stud.
*This post contains affiliate links for your convenience. Click here to read my full disclosure policy.
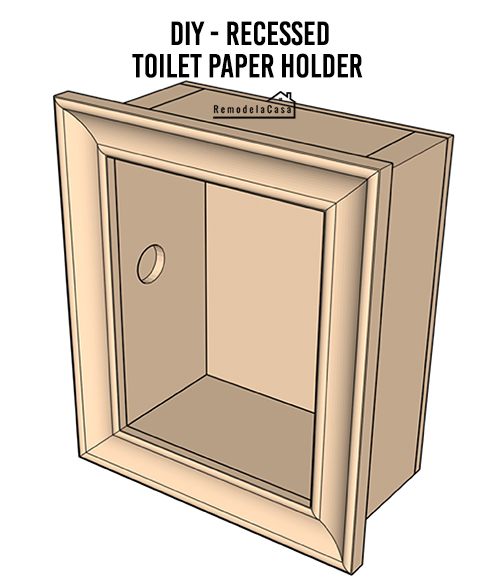
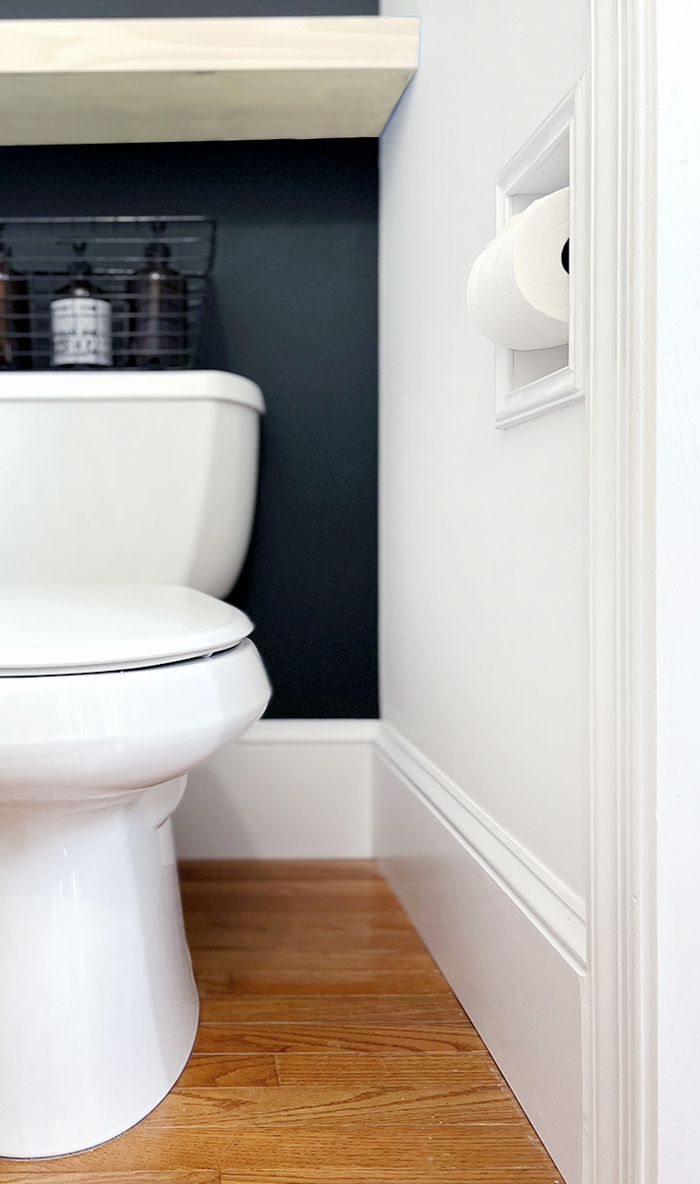
The solution to the toilet paper holder was to build a recessed model—that would not take up the 32" of total space in this bathroom!
The best part about this project is that if you have the tools and a few pieces of scrap wood/molding, you only need to buy a $2 toilet paper holder tube (in any shade you wish).
You can get the free plans for this DIY - Recessed toilet paper holder right HERE.
The materials you'll need:
- 1 x 4 pine: 2 pieces - 9" x 3-1/4" (sides)
- 1 x 4 pine: 2 pieces - 5-1/2" x 3-1/4" (top & bottom)
- 1/4" Plywood: 1 piece - 9" x 7" (back)
- Panel molding
- Toilet paper holder - the tube - I bought it in Satin-Nickel color, but be aware that it's plain plastic.
- 8 - 1-1/4" wooden screws
- Wood glue
- 5/64 drill bit
- 120- Grid sandpaper
- Paint or stain supplies
The tools you might need:
Directions:
1. DRILL THE HOLES THAT WILL HOLD THE TOILET PAPER TUBE
Mark the locations for drilling the holes on both side pieces.
Their location is 4" inches from the top of the board and 2-1/2" from their back. Make sure you label all those wooden pieces, left, right, top, bottom, front, back, etc.
Use a 5/8" spade drill bit attachment to drill the holes. Painter's tape on the spade bit will mark the 1/4" depth you must drill.
Sand and clean the little area. I used wood putty to patch the little hole left behind.
| Drill | Spade Drill Bit | Toilet Paper Holder |
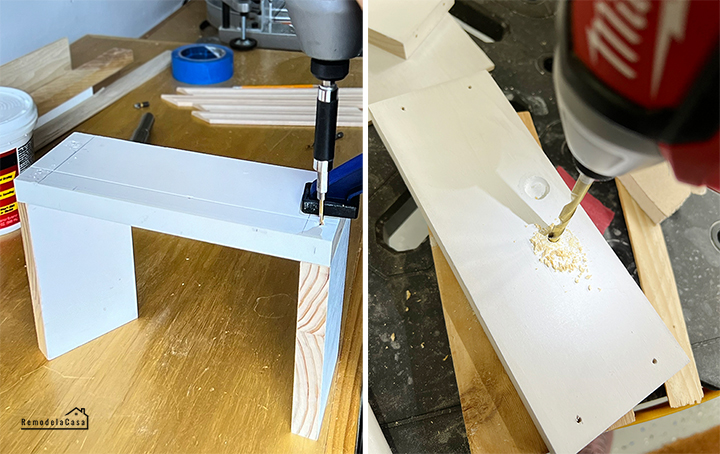
2. DO PREDRILLS
To assemble the little box, two screws are drilled through the top and bottom of each side piece.
I used a 5/64 drill bit to do predrills or pilot holes - The left picture below.
At this point, I also drilled a couple of holes to drive the screws when installing the box on the wall.
3. SAND & PAINT OR STAIN
Sand all the pieces smooth and clean, then paint or stain them.
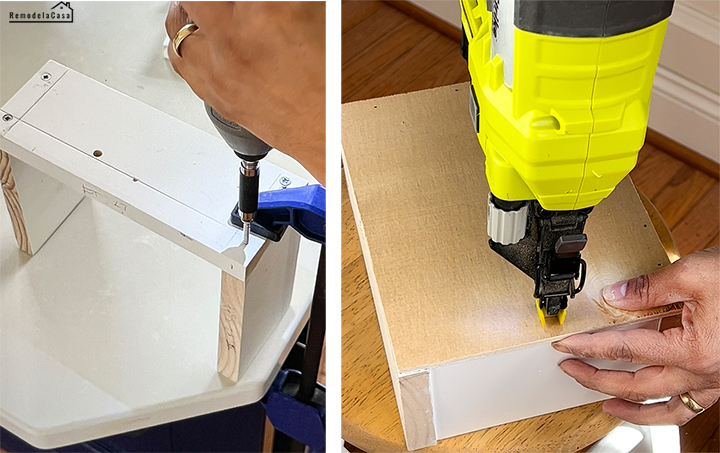
4. ASSEMBLE THE TOILET PAPER HOLDER
Assemble the box by driving the 1-1/4" wooden screws onto the top and bottom sections - Left picture below.
Use 1" brad nails to attach the back 1/4" plywood.
5. INSTALL THE BOX
Decide where to install the box and make sure there's a stud to attach it to.
Bring the box and trace its area on the wall. Ensure its level and that the stud is located to the right or left of the box.
Use a drywall saw to cut along the lines.
- ADD EXTRA SUPPORTS
I had one stud on the left side of my configuration. A door frame is about two inches away from the new opening on the right-hand side.
I used scrap pieces of wood and a right-angle magnetic attachment to secure that wood block onto the door frame. That way, I had a surface on the right to attach the box to.
- BRING IN THE BOX AND SECURE IT IN PLACE
I used 1-1/2" screws, once again driving them with the right-angle magnetic attachment to secure the toilet paper holder onto the studs on the wall.
All that's needed is to install the tube & toilet paper!
I know, it doesn't look pretty. :/
- ADD A PRETTY FRAME
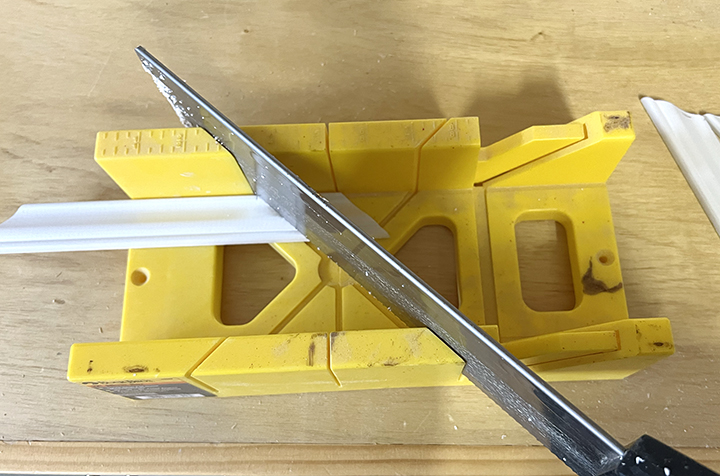
Panel molding cut at 45 degrees (mitered) concealed the gaps around the box and wall.
I assembled it beforehand using wood glue and brad nails. Then, I used my RYOBI AirStrike to drive 1" brad nails into the recessed toilet paper holder to secure the frame.
Look at that profile! No one can blow this one away. :D
Yep. I'm ready to give this area a couple of coats of paint. ;)
I love how sleek this space looks now.
For more projects going on in this powder room, check these out:
DIY - FLOATING BATHROOM VANITY
FLOATING SHELVES MAKEOVER
DIY - PLANKED CEILING
*This post contains affiliate links.









Great idea! Gives you so much more room! I've been contemplating putting a hook for mine inside the vanity door to hide mine, and move it from behind (on the same wall as the toilet) to in front. Still just a thought for now, haha!
ReplyDeleteAlexandra
OnRockwoodLane.com
EyeLoveKnots.com
Thanks for the great DIY guide!
ReplyDelete