Hey there,
Isn't it awesome when you find a project that you love and you're lucky to have everything you need to do it!
Well, this is that kind of project. :)
I visited this blog HERE and I liked everything Kristin did for her kid's homework area... So much so that I almost wanted my kids
to be little again for me to design a beautiful homework area like the one Kristin did.
Well, not really, I'm not missing those afternoons full of homework. :/
Anyways, the project that put my brain in checklist mode was the Swiss cross rug with it's classic and simple design.
Gray rug ☑
White paint ☑
Brush ☑
Cardboard ☑
I had everything to create the cute Swiss cross rug she did! Insert happy face right here. :D
You need to go and check her tutorial, I changed it slightly and used a different paint.
The main ingredient, the rug I used, is this set of modular tiles that I've had forever. I bought them like six years ago at Floor. They're a low pile carpet tile, that nowadays I don't know why I bought, they're boring, buy hey, they've held very well as you can see - talk about easy cleaning-.
During Spring, I covered them with a small area rug to brighten up the room. However, as soon as I saw Kristin's project, the rug went upstairs to my bedroom and I began painting the crosses.
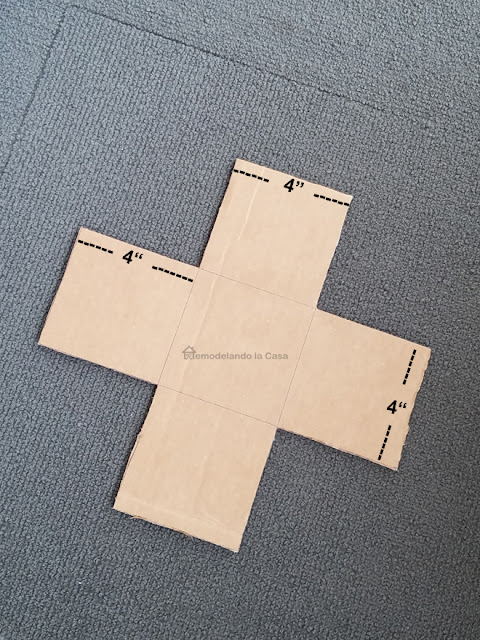
This is the template I used. I placed it in the center of each tile...
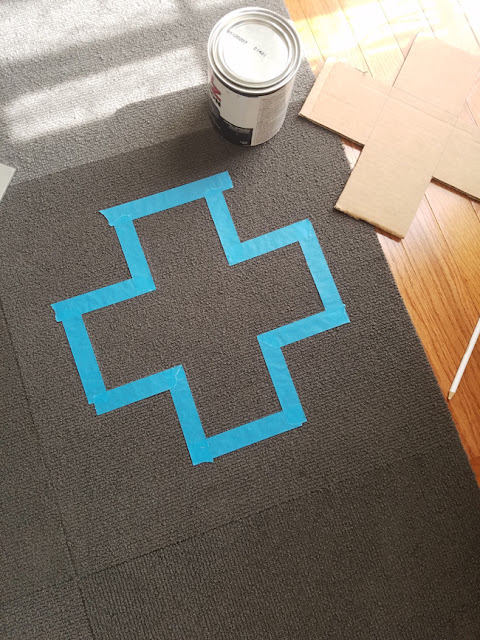
And taped the area all around it.
The paint I used: Kilz Adhesion, which is a primer that I had on hand, and since I know how durable it is, was the main reason for me to use it.
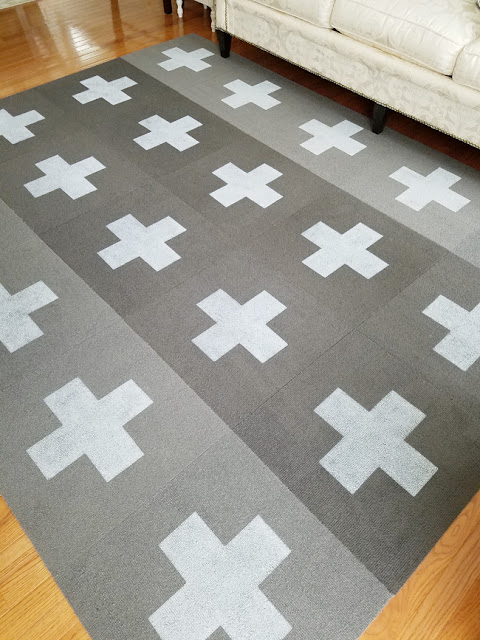
One after one, twenty crosses were painted. Can you believe I used the same pieces of tape each and every time?!
Yep. The brush was lightly dipped into the paint and then it was like dry-brushing the crosses, always working the brush against the tape and into the inside of the cross.
Well, just like my inspiration, I love it!
PIN IT for later!
The best part about this project is how cheap it turned out. If you don't have a gray rug, head over to Kristin's blog she found one for only $20!
For more DIY home projects check these out:


This is great, Cristina. I love it how it looks in your living room. Beautiful.
ReplyDeleteFabulous transformation! Looks great in your living room.
ReplyDeleteI love it, Cristina!
ReplyDeleteAyyy cristina , esa sí que es una gran idea , me encanta esas cruces en una alfombra , lo veo muy nordico ...
ReplyDeleteI loce this nd it would be such an easy weekend project and get rid of the wood floors we have now that drive e nuts with grooves all over them impossible to sweep or mop tears my mop all up , going to show this to hubby and say lets do this!
ReplyDeleteI loce this nd it would be such an easy weekend project and get rid of the wood floors we have now that drive e nuts with grooves all over them impossible to sweep or mop tears my mop all up , going to show this to hubby and say lets do this!
ReplyDeletei cant stand our wood floors they have grooves in between each plank and also inside each plank..pretty but impossible to sweep or mop this would be an easy over the weekend project to change it!
ReplyDeleteAdorns! Want in my living room!
ReplyDeleteThis is so AWESOME!! I seriously love it Cristina! It is also so cool you were able to re use the tape, cause I was thinking, it would be so much work to tape every time! Ha ha! Are your carpet tiles attached together? Just curious, I love the color variation on the ends!
ReplyDelete