Add style to your Jacuzzi and bathroom with a beautiful, removable tub skirt made from simple materials.
Hello there!
Last week, during the reveal of the hallway bathroom, I promised to give you all the details about the tub skirt. Well, this is the post.
As I mentioned, we were lucky to receive this tub from my BIL. All the tub's mechanics, heater, jets, etc., were in perfect condition. However, the tub had a tear in the lower front part that prevented him from using it in his project. Knowing that my daughter is a big Bath & Body Works fan, he asked if I wanted to use this tub. Well, YES was my answer! :)
The small tear was still visible when the original tub skirt was on, as seen in the picture below. Even though it wasn't terrible, the skirt's design and plastic material intensified my desire to build a prettier wooden skirt.
*This post contains affiliate links for your convenience. Click here to read my full disclosure policy.
| similar tub |
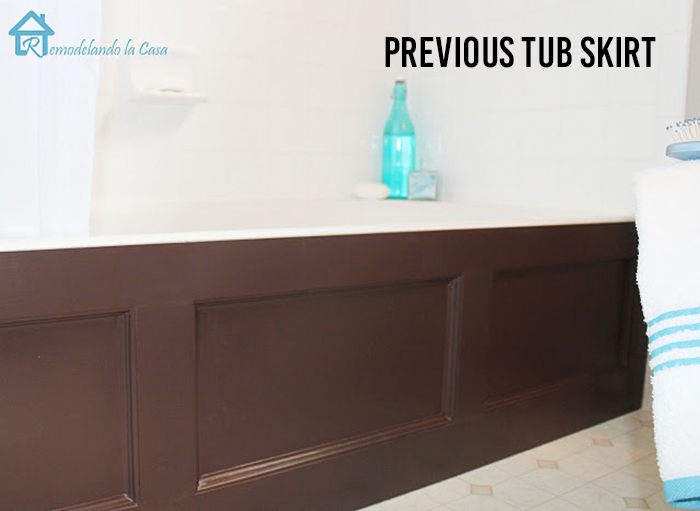
I wasn't new to tub skirts. When I first gave this bathroom a makeover more than 10 years ago, I updated the plain tub the builder installed by adding a tub skirt.
The previous tub cover had three panels, and I painted it this rich brown I was so in love with.
The three panels with the surround molding and dark color gave that tub skirt a more traditional look. I wanted a cleaner, modern look for the tub skirt this time.
Another important aspect was that the new tub skirt had to be removable. We must reach all those Jacuzzi components in the area below at any time.
For my previous tub skirt, I used 1 x pine boards (3/4" thick). Since I wanted a cleaner look, the new skirt was made from half-inch poplar. No need for moldings around the panels.
Let's look at how you can build a clean, modern tub skirt as well!
- 1/2" x 4" S4S Poplar boards
- Hardboard
- Wood Glue
- Tape Measure
- Kreg Jig
- Hand-Router with Rabbet & Rounding-over bits
- Drill
- Miter Saw or handsaw
- Push points
- Clamps
- Paint and/or stain supplies
Directions:
CUT YOUR MATERIAL
You'll only need five lengths of poplar boards and two hardboard panels.
The two long lengths of poplar boards had to be determined by the tub's length. The other three smaller board lengths are determined by how tall or low you want to build the tub skirt.
I used my miter saw to cut the material and a block stopper to make those repetitive cuts consistent and fast.
MAKE RABBETS
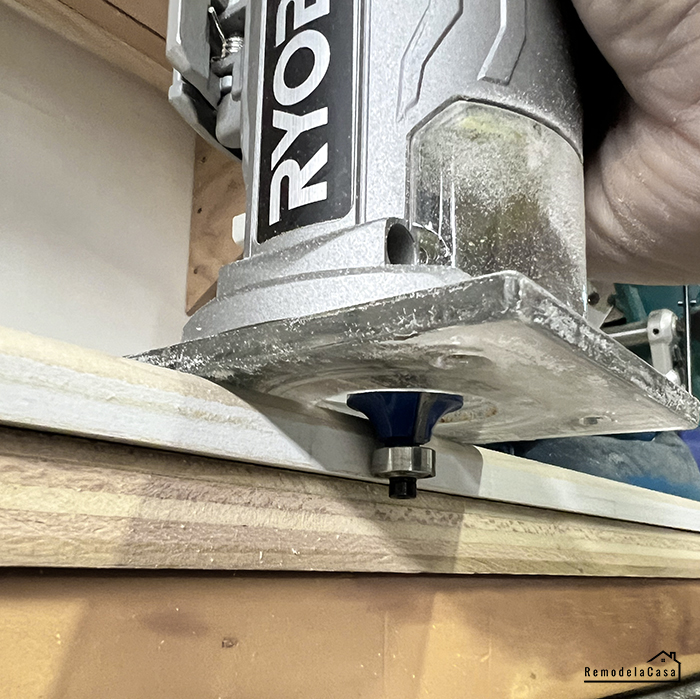
This tub skirt project is very similar to building a picture frame. You have to make rabbets, the small indent on the wood or lip where the picture or print will sit. In this case, it will hold the cardboard panels.
Then, adjust the router bit to go 1/8" down into the wood. Go all along, rabetting the side of the boards that will hold the panels.
Adjust the router once more, bringing the bit 1/8" lower, and repeat the process once more.
Perhaps you can do the 1/4" rabbet in only one pass, but it's more stressful for the router.
I usually like to go on two passes, even more so if I'm dealing with hardwoods.
I also use a rounding bit all along the top front of the poplar board.
In my previous tub skirt, I didn't round that board, and it was a bit too sharp for my liking.
DRILL POCKET HOLES
Set your Kreg Jig for 1/2" material and drill pocket holes on both ends of the small vertical wooden pieces.
PAINT OR STAIN THE BOARDS
I primed and gave all the boards two coats of BM Moonlight White.
ASSEMBLE THE TUB SKIRT
Do a dry fit by assembling the frame without glue to get a perfect fit.
Once happy with the fit, use wood glue and 1" pocket screws to assemble the frame permanently.
What's left is to measure and cut the cardboard panels to size.
Note that I went all along the boards when routing all my pieces. That was a mistake that I knew I was getting into. I should've measured where the small boards would connect and stopped the router from reaching those connection points.
Before assembling, I had to glue 1/4" square dowels to cover those areas.
Using cardboard for the panels ensures a very smooth surface. I used these panels I had in the garage from a previous project.
I used liquid gesso to prime these boards. You can also use a primer for this type of sleek material.
INSTALL THE CARDBOARD PANELS
I used push points to install the panels onto the frame.
I didn't have a large flat screwdriver on hand, but this tool worked like a charm.
INSTALL THE TUB SKIRT
This is how they look, with their tip inside the frame and the back holding the panel.
I ran out of push points, but I couldn't wait to assemble and see how the wooden cover looked in front of the tub.
I used Command Strips to secure it to the tub.
There's a small gap all around, but it doesn't bother me. Even with the original skirt, there was also a little gap.
If you don't need the tub skirt to be removable, you can use liquid nails to attach it to the tub and caulk all the gaps around it, as I did with the old tub HERE.
Love its new look!
*This post contains affiliate links.


New comments are not allowed.