This post is sponsored by The Home Depot.
Door trim, or better yet, interior door casing, is the trim around a door. It is an architectural decorative feature that glams up the door and creates a beautiful transition between the jamb and the wall.
In our case, the builder wrapped most of the door openings in our house with Sheetrock, and this one from the dining room to the kitchen was no exception. It was about time to give it some love!
Work in this dining room was completed a few months ago when it was adapted to serve as a dual-purpose dining room and office space.
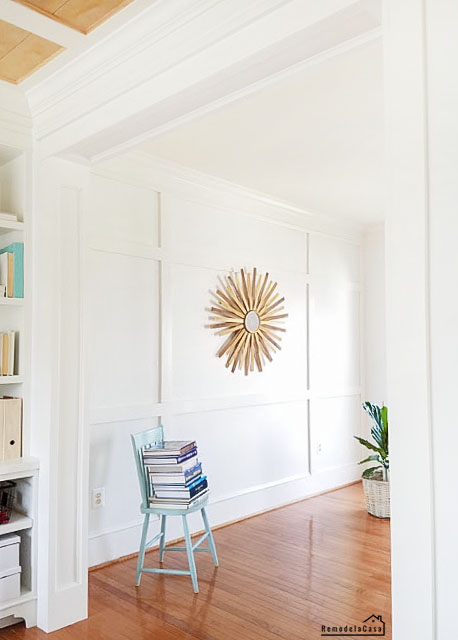
I thought this room had all the bells and whistles a room could possibly have: window trim, new chunkier baseboards, a giant wall of build-ins, a coffered ceiling, and even an enormous black chalkboard.
Really, what else?
Ha, looks as if I was wrong!
Mr. RLC brought it to my attention two weeks ago while we had a cup of coffee. He looked up to the wall he was facing (above picture) and said, "Hmm, why didn't you add trim to that doorway?" "It looks like it's missing it."
I couldn't believe he was saying that! :D He doesn't pay much attention to that kind of stuff. But, the little seed was planted. ;)
Well, I've had trouble with this doorway since I removed the old baseboards. The baseboards covered this big gap on the floor all around the door.
My general rule is to leave the inside part of the doorway (left picture above) flat—no trim, nothing there. However, given that I had that big gap, my only solution was to do the same, add baseboard all around it, and leave it just like that.
*This post contains affiliate links for your convenience. Click here to read my full disclosure policy.
However, the baseboard comprises a 1 x 8 board and the baseboard cap above it.
I brought a scrap piece of 1 x 4 to mark and use as a guide on where to cut that cap to fit the casings or 1 x 4s.
You can use it in those hard-to-reach spots. It cuts through metal, drywall, wood, tile, you name it. And you can use it with many accessories for various applications.
The 1 x 4s or side casings & head casing were installed using my Ryobi 15-Gauge AirStrike Cordless Angled Nailer.
Ha, looks as if I was wrong!
Mr. RLC brought it to my attention two weeks ago while we had a cup of coffee. He looked up to the wall he was facing (above picture) and said, "Hmm, why didn't you add trim to that doorway?" "It looks like it's missing it."
I couldn't believe he was saying that! :D He doesn't pay much attention to that kind of stuff. But, the little seed was planted. ;)
Well, I've had trouble with this doorway since I removed the old baseboards. The baseboards covered this big gap on the floor all around the door.
My general rule is to leave the inside part of the doorway (left picture above) flat—no trim, nothing there. However, given that I had that big gap, my only solution was to do the same, add baseboard all around it, and leave it just like that.
*This post contains affiliate links for your convenience. Click here to read my full disclosure policy.
Now that Mr. RLC pointed it out, I started to think about how to add the trim around the door.
And well, let me show it to you because it's the easiest door trim I've ever done.
I didn't want to damage the baseboards; they cover that gap!
And well, let me show it to you because it's the easiest door trim I've ever done.
I didn't want to damage the baseboards; they cover that gap!
However, the baseboard comprises a 1 x 8 board and the baseboard cap above it.
I brought a scrap piece of 1 x 4 to mark and use as a guide on where to cut that cap to fit the casings or 1 x 4s.
I was feeling lazy and wanted to avoid pulling up any trim. :)
The Dremel Multi-Max oscillating tool was the perfect solution for this job. I followed the lines I drew, and the Dremel cut them like butter. I had to be careful not to cut the 1 x 8 baseboard or go into the Sheetrock.
The corner cap piece got loose, but that wasn't a problem. My main concern was to have clean cuts; as you can see, I got that.
I love my Dremel, and I think this is the handiest and most versatile tool I have in my stash. Whenever I have trouble with a project, this tool gets me out.
The Dremel Multi-Max oscillating tool was the perfect solution for this job. I followed the lines I drew, and the Dremel cut them like butter. I had to be careful not to cut the 1 x 8 baseboard or go into the Sheetrock.
The corner cap piece got loose, but that wasn't a problem. My main concern was to have clean cuts; as you can see, I got that.
 |
| | Dremel Multi-Max oscillating tool | |
You can use it in those hard-to-reach spots. It cuts through metal, drywall, wood, tile, you name it. And you can use it with many accessories for various applications.
The 1 x 4s or side casings & head casing were installed using my Ryobi 15-Gauge AirStrike Cordless Angled Nailer.
For the small trim pieces, I used my new Makita Pin Nailer, which was lots of fun! Its lightweight, compact, and ergonomic design makes it my favorite for small wooden projects. And hey, it's battery-operated.
 |
| | Makita 23-Gauge Cordless Pin Nailer | |
I used to have lots of trouble installing small trim with a regular nailer. The little returns of the half-round trim broke apart when I tried to install them with brad nails. I glued them in place and waited for the glue to dry before continuing with the sanding and painting. Well, not anymore!
Those 23-gauge micro pins or little nails are tiny. They don't even have a head, perfect for attaching those small pieces of wood.
It's hard to see the little holes created when driving one of these 23-gauge micro pins; the arrow points at one of them.
Those 23-gauge micro pins or little nails are tiny. They don't even have a head, perfect for attaching those small pieces of wood.
It's hard to see the little holes created when driving one of these 23-gauge micro pins; the arrow points at one of them.
The holes on the 1 x 4s created by the 15-gauge brad nails seemed huge, but that's a totally different application.
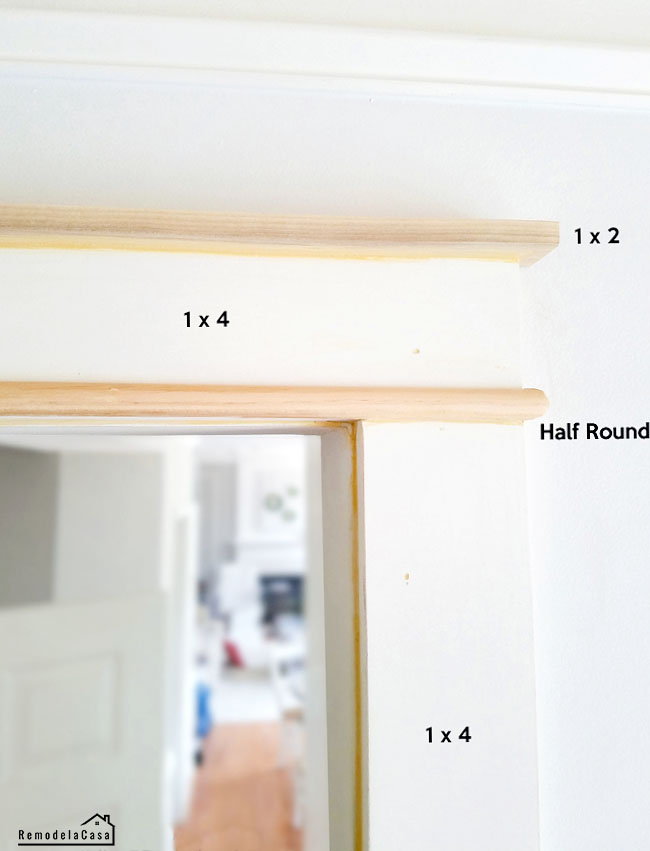
The half-round trim was added at the lower part of the header piece or horizontal 1 x 4.
On top of the same header piece, the 1x2 is attached, leaving a 1/2" overhang on both ends.
The final details are filling all the holes and gaps with wood putty and giving all the trim pieces a good sanding before priming and painting them.
Here is how the lower part looks now. I still need to add the shoe molding at the very end.
If your floors are fine, you can install a plinth block to improve the transition from the baseboard to the door trim.
And you know what? Mr. RLC was right. That doorway needed some trim! :D
On top of the same header piece, the 1x2 is attached, leaving a 1/2" overhang on both ends.
The final details are filling all the holes and gaps with wood putty and giving all the trim pieces a good sanding before priming and painting them.
Check this small detail added to that small wall on the left side of the door.
For more door and window trim ideas, check these out:
For more door and window trim ideas, check these out:
I acknowledge that The Home Depot is partnering with me to participate in the promotional program described above (the "program"). As a part of the program, I am reciving compensation in the form of products and services for the purpose of promoting The Home Depot. All expressed opinions and experiences are my own words. My post complies with the Word Of Mouth Marketing Association (WOMMA) Ethics Code and applicable Federal Trade Commission guidelines.
*This post contains Affiliate Links for your convenience*


Oh my word, you make it all sound so easy. Love all of your trim.
ReplyDeleteIt is, Marty! Well, having the right tools helps a lot! Thanks for stopping by. 😊
DeleteI love the trim. I need to do the doorway from the hall to the greatroom so I was glad to read this. Plus now I what Dremel to get.
ReplyDeleteWoohoo it looks like you're ready to tackle It, Debra! You're gonna love it!
DeleteSoo pretty! I love, love the new trim! xxx Maria
ReplyDeleteHi Maria, thanks so much! ❤
DeleteWow! Fantastic!
ReplyDeleteOf course, I don't have those tools...and don't do these kinds of things....but you are amazing to do them! It looks wonderful...
Nancy
wildoakdesigns.blogspot.com
Looks fabulous! Great job!
ReplyDeleteYou are certainly the trim queen!
ReplyDelete