

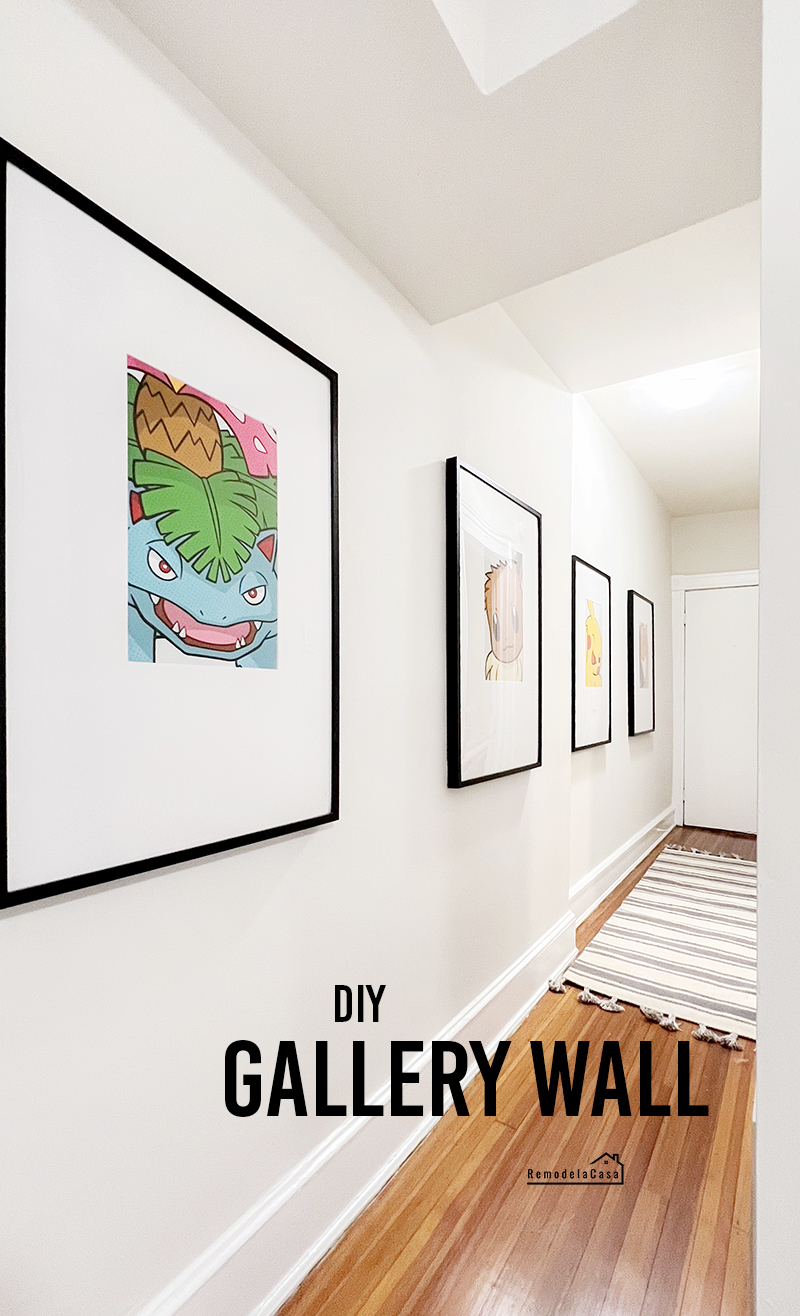
A gallery wall is the first welcoming sight visitors get when entering my daughter's apartment in this gorgeous building. A low-cost DIY project that infused a narrow hallway with warmth.
Hello there!
As I mentioned in my previous posts, my daughter moved to Baltimore, and now I'm also enjoying all the beautiful architecture this city offers.
Look at that! I can't stop admiring this building.
The old row houses, three in this picture, each home has three levels with two apartments on each floor.
As with most old buildings, this one has many original details. Chunky baseboards, pretty doors and windows, funky walls, high ceilings, oh, and a central, winding staircase with which I have a love-hate relationship because it is beautiful but so painfully narrow for when you're moving huge stuff.
In an upcoming post, I will give you a tour of the apartment before and after moving in.
This post today is about warming up the longsome hallway you see as you open the entrance door.
The picture below was taken at the apartment entrance door. You walk six feet in, and you reach the bedroom door. You are in the living area eight more feet past the door.
The only way to warm up this long, narrow hallway, only 32" wide back there, is by dressing up those walls.

Let me show you how it all was sorted out!
This is my daughter's apartment; she wanted her own say about decor choices for this classic apartment. She requested pops of color to liven up those bright white walls.
I was the one that brought Pokemon into the equation, as I've seen her collecting Pokemon cards, pillowcases, stickers, etc., all of her life. She consented immediately.
I found this set of Pokemon posters which are good quality. Their size, 12" x 18", wasn't optimal for this project, as I needed to cover around 14 feet of wall space.

I could buy oversized frames and display the pretty posters in them.
The main problem when buying these large frames is the mat opening. That opening was way too big for the size of our posters.
We also wanted our posters to be displayed in a bottom-weighted way which is when the bottom border of the mat is wider than the top border.
We had two options; the first one ordering the mat boards online or at a local art store to our own dimensions and likes. The price to pay would've been considerable, close to $1,000. The second option was buying the materials and DIYing the mat-cutting process.
You guessed it! We took the second option, and I'm here to tell you how I did it and how it was easy to accomplish. The primary materials used for our gallery wall cost $260.


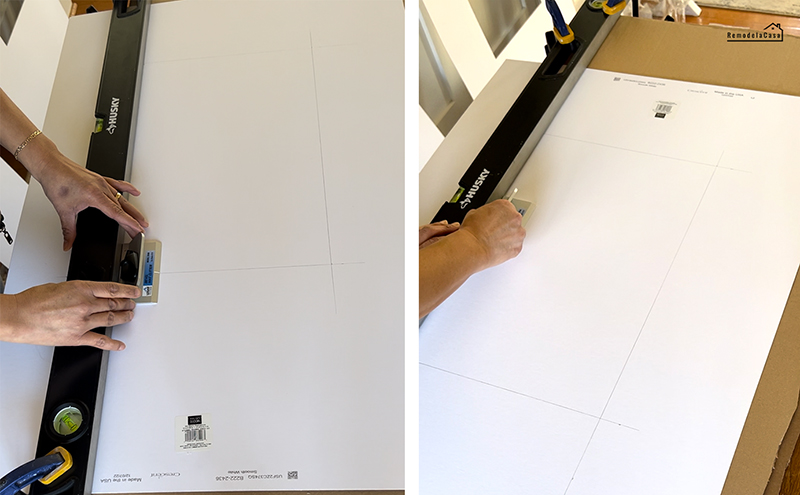
MEASURE AND MARK THE MAT
The frames I used: Ikea black Ribba frames 24" x 36"
The main materials and tools you'll need to create a similar gallery wall:
- 5 Ribba Frames 24" x 36"
- 5 Uncut Matboard 24" x 36" + buy at least one extra board for practice or as a backup
- 5 Graphics - Pokemon Friends Posters 12" x 18" (7 posters included)
- Mat Cutter
- Tape Measure
- Straight edge
- Clamps
- Command Hanging Strips
- Utility knife
HOW TO CUT PICTURE MATS FOR PHOTO FRAMING
The most essential tool to have at hand is a mat cutter. I bought this economical push-style mat cutter, which had great reviews, was easy to use, and did the job.
The recommendation comes from this rookie who got a decent picture gallery to show off. Five frames with their corresponding mats. ;)
The Logan push-style mat cutter comes with three blades and instructions on how to use it.
Determine the border size needed for your mat.
That border size is determined by the size of your picture. Remember that your print or poster needs to be covered by the mat at least 1/4" all around.

Mark the area and trace the lines on the back of the mat.

PREPARE FOR CUTTING
Use a straight edge and clamp it all along the first line to be cut. I used my 48" level, which has a metal edge.
By the way, I used two pieces of flat cardboard below the mat to prevent damage to the wooden table. The clamps were holding all those layers tight to the table.

SET THE BEVEL BLADE'S DEPTH
Install the blade and push down the mechanism to see how far the blade comes at the bottom of the cutter.
The right picture below shows how the blade compares to the mat-board thickness I was about to use. In this case, the blade exposure needed to be decreased by turning the screw on the bottom of the plate clockwise.

CUT THE MATBOARD
Place the mat cutter against the straight edge and line up the start line with the little center line indicator on the cutter. I went slightly outside the starting line.
Push the blade into the mat and continue pushing the cutter along the straight edge while holding the blade down until you reach the other line. Once the center line indicator aligns with that end line, you can release the blade and pull the cutter.
I used the mat cutter from right to left to cut along the lines. By mistake, or better yet, as a rookie, I did it the opposite way on my first try, and it crumbled up that part of the board.
You can see those mistakes in the picture below:
- You can see the crumbled cut on that corner.
- I took the wrong measurements! Can you see that line all along the poster? It wasn't covered by the mat! That opening should've been smaller.
- Those rough cuts at the top were created when I didn't push the blade all the way down. It didn't cut that last layer of the board. When I cut it with a utility knife, it wasn't too sharp. :/

Practice on a spare piece of cardboard. The more you practice, the better you get at it.
I changed the blade's position after cutting the third mat board. A new blade ensures sharp edges on those cuts. I only used one blade for these five, oh well, six mat boards I cut.

For attaching the posters to the mat boards, I used tape. Four pieces of tape were added to each corner. Sticky side up.


BRING IN THE FRAMES!

Then, I brought the mat on top of the poster, curving it to better position it inside the lines before touching the tape. Once the four corners were set in place, I turned it around to add more tape.

The last part is to install each mat/poster inside the frames.


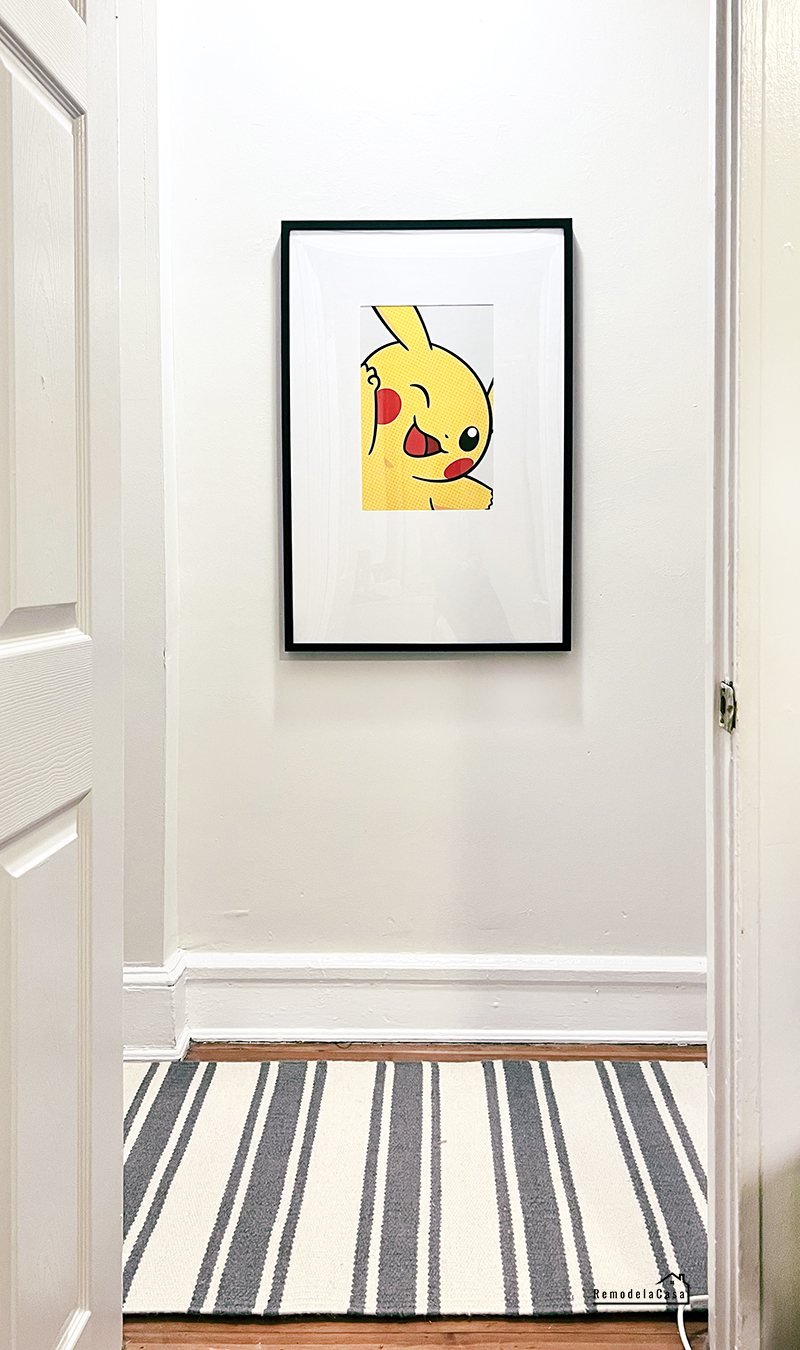
Pikachu is my daughter's favorite! I ensured it was there, cheering her up every time she steps out of her bedroom.


HANGING UP THE FRAMES
This is a rental. No nails are allowed on those walls. I used Command strips to secure the frames firmly to the wall.
And well, this is how this gallery completely changed this long hallway.
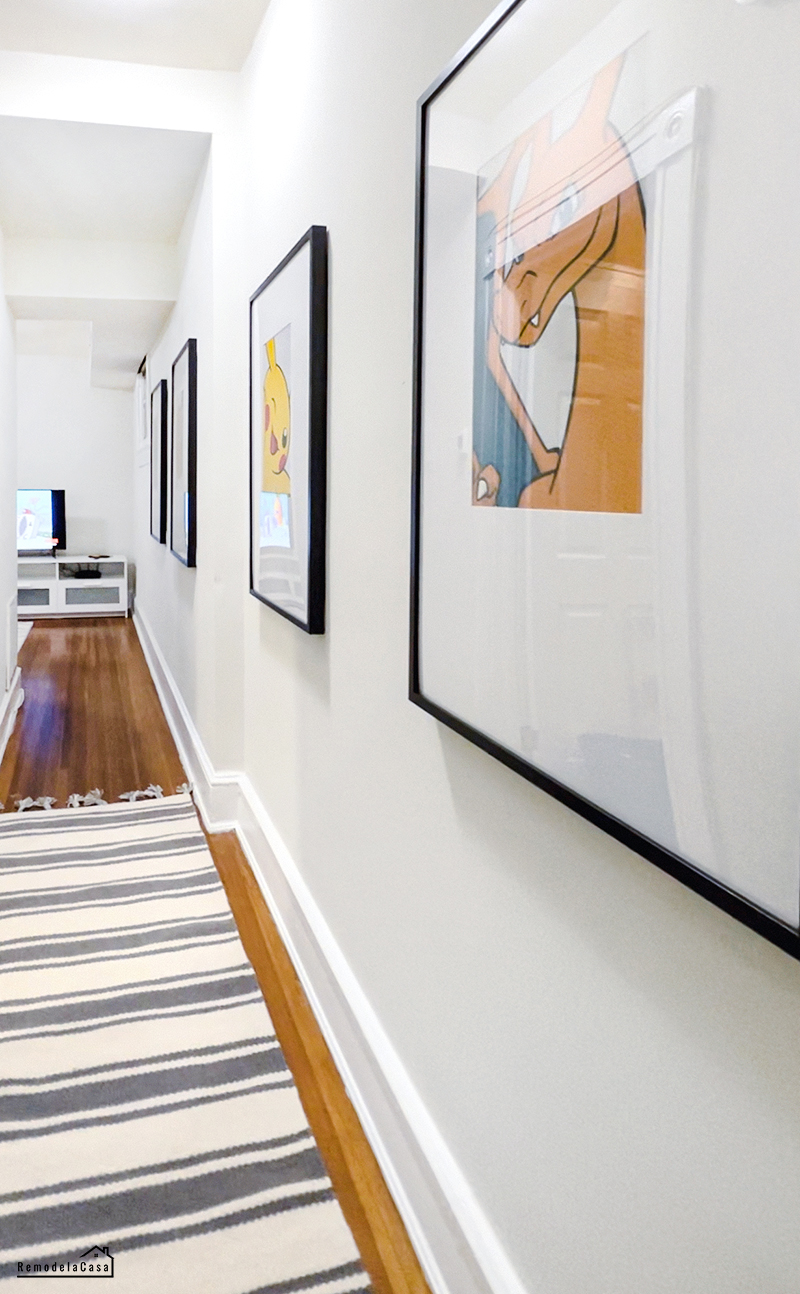
Here's a peek at the living room.

And I can't let you go without a before and after!
The lonesome hallway...
And now, with the new Pokemon gallery!
By the way, we only used four frames in the hallway, as the wall has this partition that didn't allow us to install the fifth frame adequately. My daughter requested the other frame to be installed in her bedroom.
This is how the $260 cost was spread:
Five Ribba frames (5% discount included): $125
Six Uncut mat boards: $40
Logan push-style mat cutter: $32
Posters: $43
Command strips: $20
For a total of $260
I have a video with more detail about this process, but I have yet to learn when this video and many more I have in my archives will be edited. Wish me luck on that one!
*This post contains affiliate links.

The difference is amazing - which is what we’ve all come to expect from you😊
ReplyDeleteAww thank you so much, Jayne! 🫶
DeleteThus is so great! Love your ideas.. My grands would especially love the Pokémon!
ReplyDeleteHi Deb, thanks! Yep. Both my kids were and still are huge Pokemon fans.
DeleteI loved this! The colors of the Pokemon characters with the simplicity of the black frames/white mattes/white walls really pops! Very unique!!
ReplyDeleteSo good to hear that! We wanted a more grown up style, and that's why we used the big black, bottom-weighted frames. Thanks!
DeleteLove the old Row houses. Nice work.
ReplyDeleteIt was fun going apartment hunting there in Baltimore. So much character in all those houses/apartments. If I find the pics, I might make a story later on. Thanks!
DeleteI love this! Never imagined Pokémon could appear so adult!
ReplyDelete