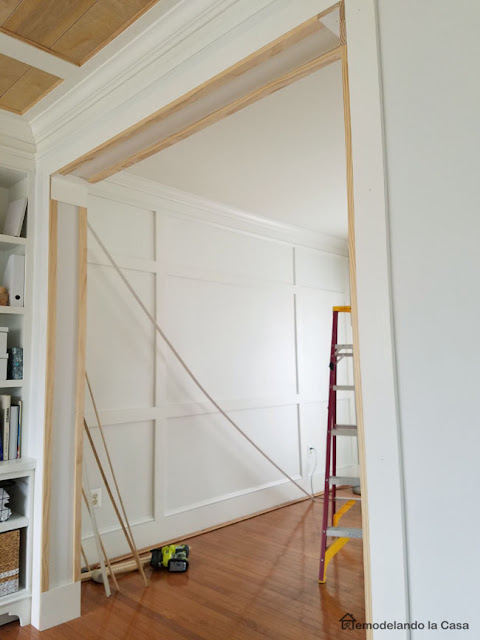
The last project added to the living room was the board and batten wall, but the room still needed some other elements like, trim around the windows, finishing installing the crown molding all around the room, and the door trim, which is the project I'm sharing today.
I added the baseboard all around the door to make it look better during the holidays. But, I didn't like how it looked, too chunky at the bottom.
So, I removed it, and you see that ugly gap on the floor due to the hardwood floor being installed without taking off the previous baseboard. Not even mentioning the pain that was to take the puny baseboards off that hole. :/
I wanted a simple trim, but I also wanted to accentuate its width, this is a load-bearing wall, almost 7" thick.
This is how this decorative trim was done →
Pieces of ¼" material were added to the base to bring the trim outside that hole on the floor.
The 1 x 8 baseboard piece was then added to the inside, big enough to cover the trim on both sides.
1 x 4 material was then added to both sides, and top of the door frame.
1 x 2's framed the inside of the door, covering those gaps created with the addition of the ¼" material.
This is how it looked with both sides and top done.
 |
| 18-Volt ONE+ AirStrike 18-Gauge Cordless Brad Nailer |
I think it's a plain trim, but the inside paneled look gives it some interest.
These were all the pieces I used. This entire trim is very similar to what was done to the window right there in the office. The only thing that changed was the topper, the crown molding was changed for a simple 1 x 2.
I still need to caulk, sand, and paint the entire thing, but I'm waiting to finish the trim on the windows to do all of them at the same time.
I'll be adding a pic of the finished project soon.
For more DIY ideas check these out:
*Ryobi Tools were given to me to try out,
I love them so much so, they are the tools I use for my every day projects.
All stated opinions are my own.*
Affiliate links were added for your convenience.


Great job -- I love all the detail! Going to pick up one of the Ryobi Cordless Nailer -- thanks for recommendation.
ReplyDeleteThanks! That's one of my favorite tools. <3
DeleteThis is great and I love how it turned out. Your home is beautiful.
ReplyDeleteAs always, you just amaze me! You need your own DIY show on HGTV.
ReplyDeleteBrenda
Yeah! What Brenda said!
ReplyDeleteCristina it turned out perfect! I am trying got figure out how to work wainscoting around all of our corners. Hope it turns out as nice as your projects!
ReplyDeleteAmazing! This looks fantastic! Great tutorial.
ReplyDeleteNancy
wildoakdesigns.blogspot.com
Looks so good Cristina. LOVE your home!
ReplyDelete