Good morning, friends!
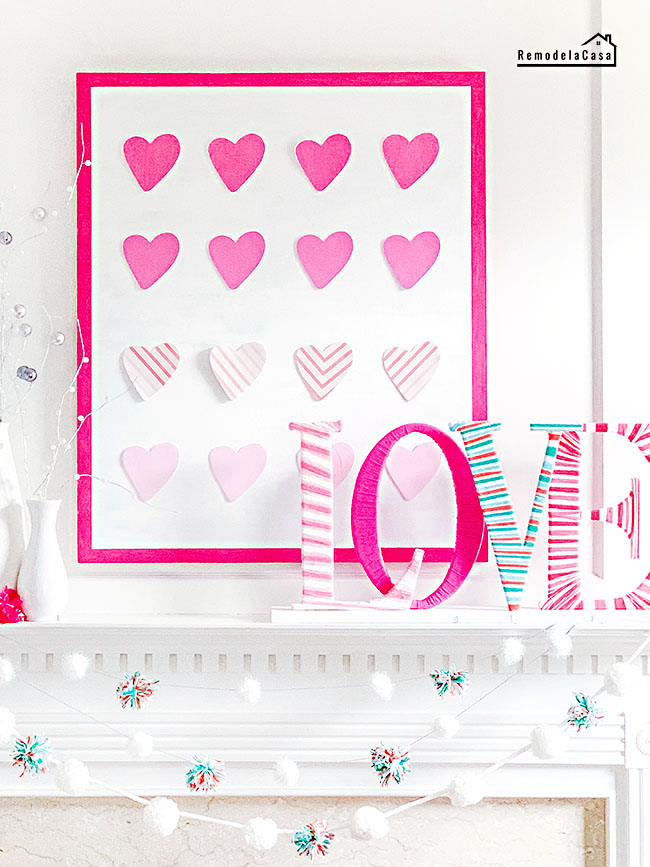
Can you believe we are already waving goodbye to January? Time is flying by, and Valentine's Day is just around the corner! If you're looking for a little post-holiday inspiration, you're in the right place. Today, I'm sharing an easy, colorful, and budget-friendly Valentine's Day mantel that is perfect for decorating your own fireplace, shelf, or vignette display.
To be honest, it's been a slow start to the year for me. After returning from my trip to Colombia, I've been struggling with two things: the winter chill and a serious lack of motivation! That combination has made it tough to jump into the big home projects on my to-do list.
However, staring at the blank space above my fireplace ended up being just the spark I needed. While perusing the Target Dollar Spot with my daughter, I found these adorable paper accent hearts—30 for just a dollar! I grabbed three packs and some colorful yarn from Michaels, and I was ready to go.
*This post contains affiliate links for your convenience. Click here to read my full disclosure policy.
The first task was to create a wall art piece using the paper hearts.
But I first needed a frame. Most of the time, I reuse the same wooden board.
I made this frame/board a long time ago. You can see that I removed the multiple nails left over from a previous project. This is a simple 30" x 35" piece of 1/2" plywood with a 1x2 border to make it look chunky.
The nails were removed, the holes were patched, and the board was painted white with a pink border.
DIY YARN WRAPPED "LOVE" LETTERS
One of my very first DIY projects was tracing and cutting a set of wooden letters to spell out the word LOVE. Over the years, these letters have made appearances all around my home, and they came to the rescue once again for this Valentine's display!
While I love the final result, I'm not going to lie: wrapping letters in yarn can be a bit tedious. However, it's the perfect "mindless" craft to do while relaxing.
The Secret to Perfect Yarn Wrapping
To get that beautiful, high-texture look, here are a few tips I learned along the way:
Secure the Ends: Use a small dot of hot glue to secure the yarn when you first start wrapping and again when you finish a section.
Stay in Place: If you're wrapping a curved letter (like the 'O') and the yarn starts to slide, just add a tiny dot of glue to the back of the letter to keep the lines crisp and straight.
Multitask: Since this project takes a little time, I highly recommend pairing it with your favorite show!
A Little Crafting Humer: I sat on the sofa wrapping these while watching Forensic Files with my husband. He watches that show so often that I’ve started joking he might be trying to send me a subtle message! 🙄
 |
| | Ryobi Cordless Hot Glue Gun | Yarn | |
VALENTINE'S DAY MANTEL
Both projects were brought up to the mantel and those pretty colors are giving this room a really comforting vibe.
I also brought this little plant from the master bathroom.
I added the newly made pom-poms to these white pom-pom garlands, which I also had in my stash.
Do you all have plans set for this Valentine's Day?
❌⭕❌⭕❌
HAPPY VALENTINE'S DAY!!


New comments are not allowed.