

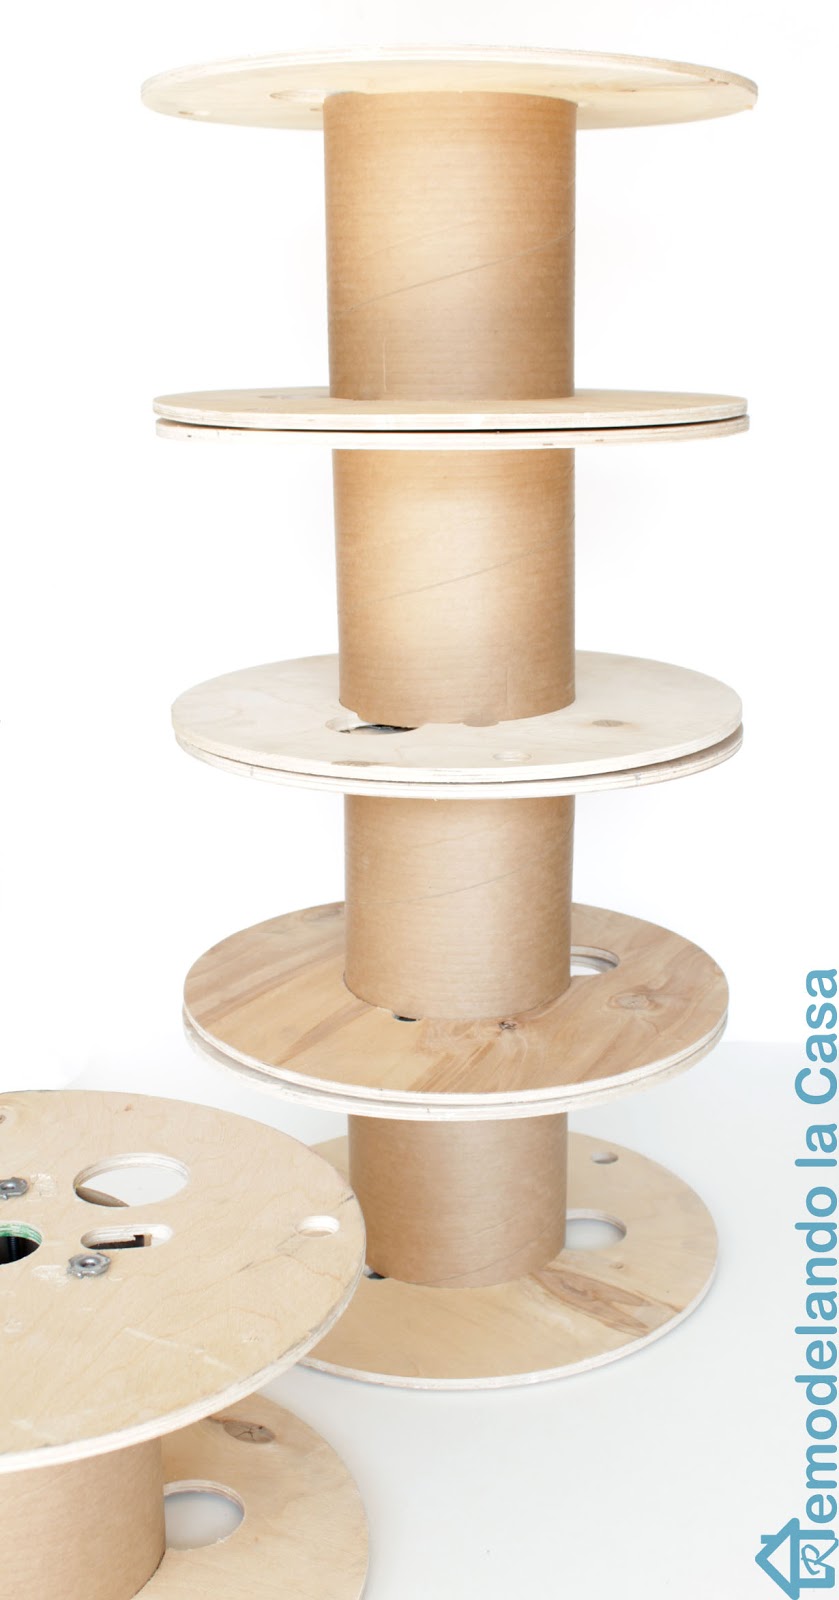
While tackling a garage clean-up recently, surrounded by discarded treasures and organizational efforts, my eyes landed on a pile of empty wire spools. These cylindrical giants, once essential for various projects, were now just taking up valuable real estate and, frankly, driving me absolutely nuts!
Instead of hauling them off to the recycling bin, a spark of inspiration ignited. What if these humble spools could be repurposed into something both practical and stylish?
Join me as I embark on a creative DIY adventure to transform one of these space-hogging nuisances into a fantastic wire spool desk organizer.
This simple yet effective project is perfect for anyone looking to declutter their desk, add a touch of rustic charm, and embrace the satisfaction of a handmade organizer. Let's get started and turn that frustration into functional flair!
The materials and tools you'll need

DIRECTIONS
*This post contains affiliate links for your convenience. Click here to read my full disclosure policy.
The materials and tools you'll need
- Wire Spool (mine has a diameter of 14½" and its height is 7½")
- 6 - ½" Plywood divisions to fit inside the spool
- Lazy Susan mechanism
- Corner molding to create the tray edge
- 1 -¼" Plywood board to fit inside the tray edge
- ¼" Hardware cloth to fit around the spool (mine was about 4' x 3¼")
- Stapler
- Sander
- Scissors
- Gaffers or Duct tape
- Wood glue
- Shelf liner (optional)
- Paint and brushes
- Gloves and safety glasses
DIRECTIONS
Cut the ½" Plywood divisions to fit nicely inside the spool.
To cover the nuts protruding from the top of the spool, a tray was built out of some corner molding left from this project and a plywood board. I think you can also use a picture frame; sadly, the picture frames I had were either too big or too small for the space.
Do a pre-fit before sanding and painting everything white or your color of choice.

Trace the circular pattern on the shelf liner (I use the liner left from this project), and cut around the shape. Place the liner on the inner lower part of the spool.

It's now time to install the dividers.
Drive two or three staples on each divider from the top and bottom of the spool (see picture below), and try positioning them equidistantly (hmmm, mine are not that equidistant). ;)

Staple the tray frame and base on the top of the spool, and try to cover most of the holes.
A shelf liner was also added to cover the base of the tray.

Do the same, but with longer staples, to attach the spool to the Lazy Susan mechanism.

Finally, cover the top edge of the hardware cloth with tape and staple it all around the spool.

At this point, you'll have turned it into this.


Once filled up, this is how it looks.
Big compartments for scissors, markers, pencils, seasonal stamps...


And some paper and peripherals on the tray. ;)

The best part is: It spins all around!
This is a good project to utilize wood remnants.
:)
Check out some more repurposed ideas you might like:


Thanks for stopping by!
:)
Check out some more repurposed ideas you might like:
Thanks for stopping by!

What a great idea to keep all those little things close at hand. Thanks so much for sharing this with us.
ReplyDeleteHave a great week.
Mary
Super cute organization idea.
ReplyDeleteSo awesome Cristina! And I love that it spins, it is super cute! Did you just paint the tape on the hardware cloth to match? You are so cleaver, I am wishing I had some of those spools!
ReplyDeleteThat is so cute! I don't think I've ever seen spools that size before. I love the way you put it on a lazy susan too.
ReplyDeleteOMG! another ingenious project Cristina! You are truly amazing!!!!!!
ReplyDeleteThank you so much ladies! Mindi, No, I didn't paint the tape, that's Gaffer's tape I love it, it comes in many colors red, black and white are my favorites ;) but what I like the most is how strong it adheres to just about any surface, it feels like cloth on the outside and it doesn't leave residue when its removed. Puff what a big commercial! ;) And no, this is not sponsored content!
ReplyDeleteYou are so creative! I would never have thought to make that out of a spool. It looks great!
ReplyDeleteThat is so creative, Cristina... just lovely!
ReplyDeleteHola Cristina !, Que buena idea hacer ese organizador se ese carrete Cristina ! Lindo trabajo
ReplyDeleteThis is perfect! You come up with the greatest ideas!
ReplyDeleteYou are so smart! I love what you did with your spools! XO
ReplyDeleteThis is so perfect, Cristina. I love the contact paper you were able to use too. I love it the entire project!
ReplyDeleteThat is such a genius idea.....love it!
ReplyDeleteOk, this is SUCH an amazing project! I am so impressed!! Wow!
ReplyDeleteV-good 🍬
ReplyDelete