Good morning friends,
During my previous post about the holiday hanging planters, you got to see how all those little planters were nicely displayed in the mudroom on an accordion peg rack. I love how the peg rack makes them look like one big piece of art, there on the wall.
Well, today I'm giving you all the details on how I built this accordion peg rack. It's easy if you can take good measurements.
Let me show you how you can build your very own peg rack. This one, hanging right there on the wall, measures 44" x 28". The awesome thing is that it isn't a set measurement! You can open or close it to fit your desired wall space. It's a big statement piece that you can create for about 20 bucks if you have most of the tools.
*This post contains affiliate links for your convenience. Click here to read my full disclosure policy.
The tools and materials you'll need:
- 7 - 1/4 in. X 1-1/2 in. X 4 ft. Poplar Hobby Board
- 1 - 5/8 in. X 4 ft. round dowel
- 17 #6 X 2 in. screws
- Saw - (You can use a hand saw, circular saw, jigsaw, or, as I did, a Miter Saw)
- Drill
- 1/8 in. drill bit
- Angle Square
- Kreg Multi-mark Measuring tool
- Awl Tool
- Plans HERE
Cut list:
2 - 48" poplar boards
4 - 36" poplar boards
4 - 13" poplar boards
17 - 2" dowels
Instructions:
1. CUT THE MATERIAL
Cut the material following the cut list above. Use a stop block or a scrap piece clamped to your fence when cutting the round dowels - no need to measure every single dowel. Wait until the blade stops moving before raising it.
 |
| | Makita Miter Saw | |
2. MEASURE AND MARK THE BOARDS
I first measured and marked one of the longest boards.
Starting at one end, the first measurement was done at the 3/4" mark.
The Kreg Multi-mark Measuring tool worked wonderfully for this task. I also marked the center of the board with a crisscross.
From that point on, the distance until the next mark is at 11-5/8".
The last mark has to be done at 3/4" from the end of the board. An Angle Square was the tool I used to transfer those measurements onto the other boards.
The next step was to drill the holes in the marked spots. I used a 1/8" drill bit.
3. MARK AND DO PRE-DRILLS ON PEGS
Mark the center of each peg with an awl, and set the hole location before drilling.
4. SAND
Use 120-grit sandpaper to smooth all those boards.
5. SET UP & ASSEMBLE THE ACCORDION PEG RACK
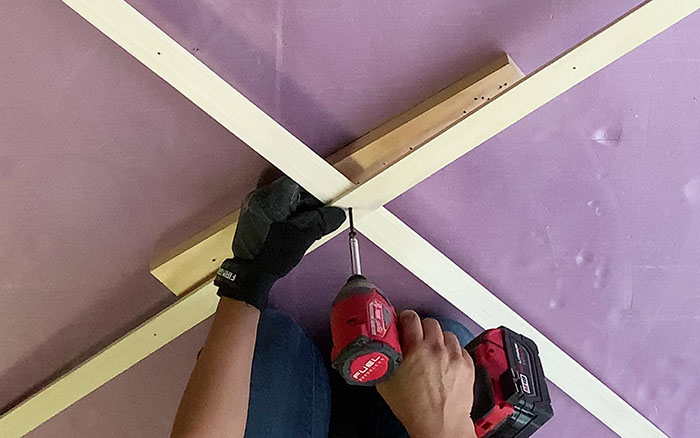
Use a large surface to assemble the peg rack. I had to work on the floor, but I used this purple insulation board, which was more comfortable than working on the hard floor.
Set up all the boards, starting with the longest, the two in the center, 48" boards, in an X way.
I started right there, in the center, driving one of the 2" screws to connect both boards.
The next step is to grab one of the dowels and begin turning/screwing it there, onto the screw.
Once you reach the poplar board with the peg, use the drill to continue driving the screw into the peg.
Continue doing the same with the remaining 16 pegs.

For the peg rack to act as an accordion, loosen the screws a bit.
This is how it looked once finished. I gave the front of the pegs a coat of gold paint.
And here you can see how it looks when it's closed up.
Suitable for storing it away, it doesn't take much space.
I added string lights from peg to peg, and they just took it to the next level!
LOVE it.
The complete details about the holiday hanging planters are HERE.
*This post contains affiliate links.


New comments are not allowed.