Early Spring I found this chair on CL, it had some kind of damage on the swivel leg, nothing that a couple of screws and wood glue couldn't fix, for $30 it was a good deal since is a PB chair ;)
After fixing the leg problem and taking away that drab slipcover, not that big change with or without it anyways.
With the leg work done, it was time to move on to making a new slipcover. Using the old slipcover as a guide, all the parts were traced onto the new fabric (a drop cloth), adding 1/2" for the seams.
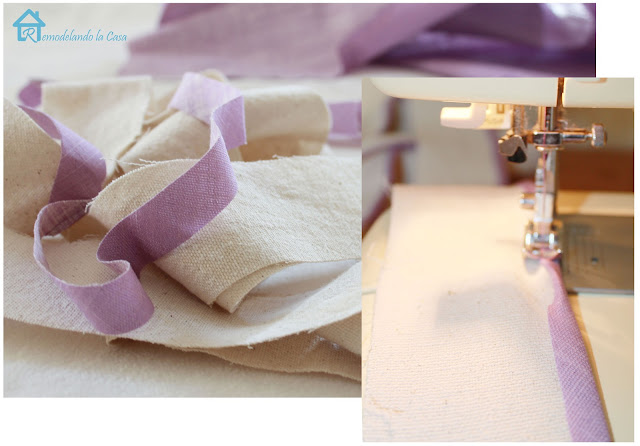
This time I didn't want a plain, plain slip, NO! I wanted to create a pretty well-fit and fun dress! Piping surely will make it stand.
When the dress was all put together, not without the usual putting in and taking it off for the hundredth time to check how well it fitted and to make adjustments, something else was still missing, the fun part!
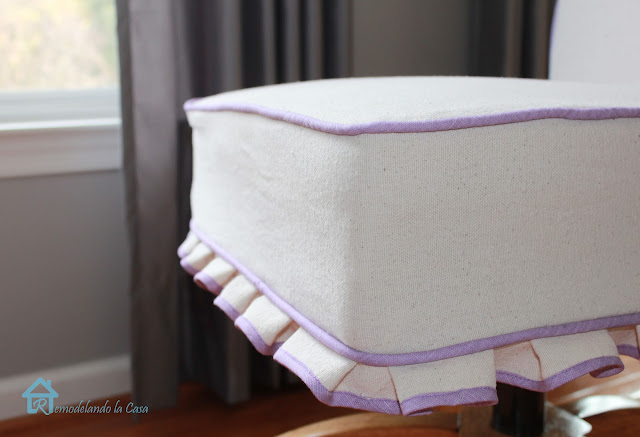
So, more strips of fabric were cut and put together to create a fun little skirt.
Those ruffles were not that easy, but well, I managed to make them behave so, the little ruffled skirt was finally attached to the dress.
And here you have the sleek, tailored dress with the fun little skirt.
The back stayed plain for a while until my daughter asked me to add something else.
The Love Peace Music sign! She is into music, but I guess all teenagers love that sign. A purple Sharpie was used to draw it onto another piece of fabric and then sew it to the back of the slip.
PIN IT!
Save the Inspiration

Ready to bring it up to my daughter's room!

.png)


.png)


Nice. I just recovered a chair very similar but with arms for my office.
ReplyDeleteYou are awesome. That chair looks so good.
ReplyDeleteHow lovely, doesn't even look like the same chair~so pretty and feminine now, I am sure your daughter loves it!
ReplyDeleteWhat a great change, I love it!
ReplyDeleteIt looks fantastic, Cristina! I love the color you chose. :) Megan
ReplyDeleteAbsolutely gorgeous! What a lucky daughter to have such a talented mom. ~ Maureen
ReplyDeleteOh, it's adorable! Even my large butt would look fantastic on those frills :) Well done.
ReplyDeleteChristina, what a darling makeover! LOVE the personalized love, peace and music sign! You daughter must be thrilled!
ReplyDeleteWOW! I love what you did to that chair - the lilac piping is a showstopper!!
ReplyDeleteWOW! Fabulous!!
ReplyDeleteAmazing...your skills are very professional! Love it!
ReplyDeleteThis is awesome! I love the contrasting piping, but even more the little ruffle. I think I need a new desk chair! ;)
ReplyDeleteAwesome transformation!
ReplyDeleteThat is one beautiful makeover! I love the purple details. Love it!
ReplyDeleteLove drop cloths used in the home, this is gorgeous !
ReplyDeleteCristina, this makeover is gorgeous! Amazing what you can do w/drop cloths! I am loving the purple too! I am currently changing everything in my home to lavenders/purples/plums family.
ReplyDeleteFrom drab to FAB! :)
ReplyDeleteYou did a great job!
~Liz
Gorgeous. What an unreal redo, I love it all. Such a fabulous chair now. Thanks for joining TTT. Hugs, Marty
ReplyDeletelovely. my daughter would love it so I know yours does. i'll be looking for office chair on craigs list.
ReplyDeleteFantastic transformation and love the project.
ReplyDeleteThanks for sharing.
Hope to see you on my blog:)
Cristina, Your transformation of this swivel chair is fabulous! Love the little skirt and the added piping. So cute.
ReplyDeleteMary Alice
Wow! How gorgeous is that! You are a very talented seamstress & I love the symbol and colors you chose. I would love for you to share at Totally Transformed Tuesday I know my readers would love to see. http://pjhdesignsoneofakind.blogspot.com I'm a new follower. :-) Peggy
ReplyDeleteThat is a beautiful chair, great job, the piping really pops stopping by from transformation Thursday
ReplyDeleteJust wondring if you bleached the cloth first?
ReplyDeleteThank you so much everyone! To Nanasewn, no it was not bleached, it was given a simple wash beforehand.
ReplyDeleteThe chair is wonderful. I haven't worked with drop cloths yet, but I have been doing projects with leftover scraps of canvas from my artist husband. The canvas comes in different weights and makes great pillows and is easy to paint on.
ReplyDeleteYou are so creative and clever, Christina! I love the piping and artwork that you added to the back, and the ruffles really make this chair unique and lovely! Well done.
ReplyDeleteWOW great transformation. Thanks for sharing.
ReplyDeleteNice!!! Your chair looks wonderful now!!
ReplyDeleteChristina,
ReplyDeleteYou are such a talent! I just love how perfectly fitted and super flirty you chair turned out!
:)
Linda
This is so chic, I am blown away by your craftsmanship! That little skirt is the perfect touch...
ReplyDelete♥Linsey
Un estupendo cambio Un abrazo
ReplyDeleteYou did such an amazing job! It fits perfectly and the purple piping adds the perfect touch.
ReplyDeleteSusan
sunflowerhugs.blogspot.com
I'm so impressed! What beautiful seams. :) Everything is nice and straight and snug fitting, as a slipcover should be. The chair looks 100x better. You are one talented lady!
ReplyDeleteDebbie
Adorable Cristina! Love the feminine touches. So cute!
ReplyDeleteMandy @ The Hankful House Blog